Category: Python Errors & Exceptions

https://zain.sweetdishy.com/wp-content/uploads/2025/12/python-2.png

  • Python – Debugger (PDB)

    Python provides a built-in module called pdb for debugging Python programs. The pdb module can be used to set breakpoints, move through code, check value of variables, and evaluate expressions. In this chapter, we will explain how to use the pdb module to debug Python programs.

    Following topics will be covered in this chapter −

    The pdb Module in Python

    The pdb module is a built-in Python module that provides an interactive debugging environment for Python programs. Internally, it is defined as a class called Pdb, which is a subclass of the bdb.Bdb class. The main advantage of pdb debugger it will run completely in the terminal, meaning you don’t need to install any additional software or IDE to use it.

    To start debugging with pdb, first import the module in your Python script −

    import pdb
    

    Then, you can set breakpoints in your code using the pdb.set_trace() function. When the program execution reaches a breakpoint, it will pause and enter the pdb debugging terminal.

    Basic Commands in pdb Terminal

    After entering the debugging terminal, you can use various commands to control the execution of your program. Here are some of the most commonly used pdb commands −

    • n (next) − Execute the next line of code.
    • s (step) − Step into a function call.
    • c (continue) − Continue execution until the next breakpoint.
    • l (list) − List the current location in the code.
    • p (print) − Print the value of a variable.
    • q (quit) − Quit the debugger and exit the program.
    • b (break) − Set a breakpoint at a specified line number or function.

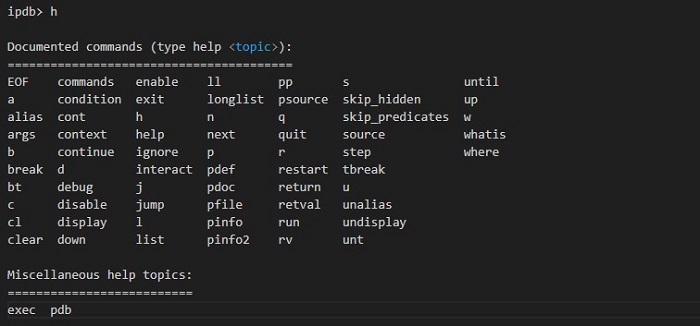
    For a complete list of pdb commands, you can use the h command within the pdb interactive environment. It will look like this −

    pdb help command

    Example of Using pdb Module

    The following example shows how pdb can be used to stop the execution of a program at certain points and inspect the values of variables.

    import pdb
    
    defadd(a, b):return a + b
    
    defsubtract(a, b):return a - b
    
    pdb.set_trace()# Set a breakpoint here
    result = add(20,30)print("Addition Result:", result)
    
    pdb.set_trace()# Set another breakpoint here
    result = subtract(20,10)print("Subtraction Result:", result)

    When the program execution reaches the pdb.set_trace() line, it will pause and enter the pdb terminal. So, the output of the program will be −

    > /tmp/ipython-input-1706780559.py(11)<cell line: 0>()
          9 x = 10
         10 y = 20
    ---> 11 pdb.set_trace()  # Set a breakpoint here
         12 result = add(x, y)
         13 print("Addition Result:", result)
    
    ipdb> c
    Addition Result: 30
    
    ipdb> c
    Subtraction Result: 10
    

    Explanation − In the output, you can see that at this terminal, we pressed the c command to continue execution until the next breakpoint. So we get addition result and program paused. Again we pressed c to continue execution and print the subtraction result.

    Checking Variable Type at Runtime

    To check the type of a variable at runtime while using pdb, you can use the whatis command at the pdb prompt. The example below demonstrates how to use the whatis command −

    import pdb
    
    a =10
    b =20.5
    c ="Hello, World!"
    
    pdb.set_trace()# Set a breakpoint here

    The output of the program will be −

    > /tmp/ipython-input-1057349253.py(7)<cell line: 0>()
          3 a = 10
          4 b = 20.5
          5 c = "Hello, World!"
          6 
    ----> 7 pdb.set_trace()  # Set a breakpoint here
    
    ipdb> whatis a
    <class 'int'>
    ipdb> whatis b
    <class 'float'>
    ipdb> whatis c
    <class 'str'>
    

    Post-Mortem Debugging with pdb Module

    The post-mortem debugging refers to the process of analyzing a program after it has crashed or reached an exception state. The pdb module can be used to perform post-mortem debugging using the pdb.post_mortem() function. You can call this function inside any exception handler at any point in your code.

    The pdb.post_mortem() function takes the traceback object as an argument, you can get it using the sys.exc_info() function. Here is an example that demonstrates how to use the pdb.post_mortem() function for post-mortem debugging −

    import pdb
    import sys
    
    defcalculate_inverse(x):print(f"Calculating inverse for {x}:")
        result =1/ x
        print(result)try:
        calculate_inverse(10)
        calculate_inverse(0)# This will raise errorexcept Exception:# This block is executed only after an exception (crash) occurs.print("\n An exception occurred! Starting post-mortem debugging... ")# Get the traceback object of the exception
        extype, exvalue, tb = sys.exc_info()# Launch the post-mortem debugger
        pdb.post_mortem(tb)

    In this example, the calculate_inverse() function is used to calculate the inverse of zero. This will create a ZeroDivisionError exception. When the exception occurs, the program will enter the except block. Here we call the pdb.post_mortem(tb) function to start the post-mortem debugging session. The output of the program will be −

    Calculating inverse for 10:
    0.1
    Calculating inverse for 0:
    
     An exception occurred! Starting post-mortem debugging... 
    > /tmp/ipython-input-1016125975.py(6)calculate_inverse()
          4 def calculate_inverse(x):
          5     print(f"Calculating inverse for {x}:")
    ----> 6     result = 1 / x
          7     print(result)
          8 
    
    ipdb> p x
    0
    

    Explanation − In the output, you can see that the program has paused at the line where the exception occurred. We printed the value of the variable x using the p command. We will get clear idea that the program crashed because we tried to divide by zero.

    Managing Breakpoints in pdb Module

    We already saw how to set breakpoints using the pdb.set_trace() function. While working on large applications, we often set multiple breakpoints in different parts of the code. So it is important properly manage these breakpoints. Here are few commands that you can use to manage breakpoints in pdb −

    • break − The break command is used to set a breakpoint at any line number from the pdb prompt. For example, break main.py:9 will set a breakpoint at line number 9 in the main.py file.
    • disable − The disable command is used to disable a specific breakpoint by its number. For example, disable 1 will disable the breakpoint with number 1.
    • enable − The enable command is used to enable the breakpoint that was disabled by disable command. For example, enable 1 will enable the breakpoint with number 1.
    • clear − The clear command is used to remove a breakpoint by its number. For example, clear 1 will remove the breakpoint with number 1.

    Here is an example that demonstrates how to manage breakpoints in pdb −

    import pdb
    defmultiply(a, b):return a * b
    defdivide(a, b):return a / b
    
    pdb.set_trace()# Set a breakpoint here
    result1 = multiply(10,20)
    
    result2 = divide(10,0)print("Multiplication Result:", result1)print("Division Result:", result2)

    In the code, we set a breakpoint using the pdb.set_trace() function. When the program reaches this line, it will pause and enter the pdb session. The output of the program will be −

    None
    > /tmp/ipython-input-2031724579.py(7)<cell line: 0>()
          5     return a / b
          6 
    ----> 7 pdb.set_trace()             # Set a breakpoint here
    
    ipdb> break main.py:8 
    Breakpoint 1 at /tmp/ipython-input-2031724579.py:8
    ipdb> break
    Num Type         Disp Enb Where
    1   breakpoint   keep yes at /tmp/ipython-input-2031724579.py:8
    ipdb> disable 1
    Disabled breakpoint 1 at /tmp/ipython-input-2031724579.py:8
    ipdb> enable 1
    Enabled breakpoint 1 at /tmp/ipython-input-2031724579.py:8
    

    Explanation − In the output, you can see that we used the break command at terminal to set a breakpoint at line number 8. Then we displayed the list of breakpoints using the break command without any arguments. After that, we disabled the breakpoint using the disable command and then enabled it again using the enable command.

    Conclusion

    In this chapter, we learned how to use the pdb module to debug Python programs. We learned the basic commands in pdb, how to set and manage breakpoints, how to check variable types at runtime, and how to perform post-mortem debugging. The debugging tool is very useful for identifying and fixing issues in large code bases. With proper practice, you can easily find and fix bugs in your Python programs.

  • Python – Built-in Exceptions

    Built-in exceptions are pre-defined error classes in Python that handle errors and exceptional conditions in programs. They are derived from the base class “BaseException” and are part of the standard library.

    Standard Built-in Exceptions in Python

    Here is a list of Standard Exceptions available in Python −

    Sr.No.Exception Name & Description
    1ExceptionBase class for all exceptions
    2StopIterationRaised when the next() method of an iterator does not point to any object.
    3SystemExitRaised by the sys.exit() function.
    4StandardErrorBase class for all built-in exceptions except StopIteration and SystemExit.
    5ArithmeticErrorBase class for all errors that occur for numeric calculation.
    6OverflowErrorRaised when a calculation exceeds maximum limit for a numeric type.
    7FloatingPointErrorRaised when a floating point calculation fails.
    8ZeroDivisonErrorRaised when division or modulo by zero takes place for all numeric types.
    9AssertionErrorRaised in case of failure of the Assert statement.
    10AttributeErrorRaised in case of failure of attribute reference or assignment.
    11EOFErrorRaised when there is no input from either the raw_input() or input() function and the end of file is reached.
    12ImportErrorRaised when an import statement fails.
    13KeyboardInterruptRaised when the user interrupts program execution, usually by pressing Ctrl+C.
    14LookupErrorBase class for all lookup errors.
    15IndexErrorRaised when an index is not found in a sequence.
    16KeyErrorRaised when the specified key is not found in the dictionary.
    17NameErrorRaised when an identifier is not found in the local or global namespace.
    18UnboundLocalErrorRaised when trying to access a local variable in a function or method but no value has been assigned to it.
    19EnvironmentErrorBase class for all exceptions that occur outside the Python environment.
    20IOErrorRaised when an input/ output operation fails, such as the print statement or the open() function when trying to open a file that does not exist.
    21OSErrorRaised for operating system-related errors.
    22SyntaxErrorRaised when there is an error in Python syntax.
    23IndentationErrorRaised when indentation is not specified properly.
    24SystemErrorRaised when the interpreter finds an internal problem, but when this error is encountered the Python interpreter does not exit.
    25SystemExitRaised when Python interpreter is quit by using the sys.exit() function. If not handled in the code, causes the interpreter to exit.
    26TypeErrorRaised when an operation or function is attempted that is invalid for the specified data type.
    27ValueErrorRaised when the built-in function for a data type has the valid type of arguments, but the arguments have invalid values specified.
    28RuntimeErrorRaised when a generated error does not fall into any category.
    29NotImplementedErrorRaised when an abstract method that needs to be implemented in an inherited class is not actually implemented.

    Here are some examples of standard exceptions −

    IndexError

    It is shown when trying to access item at invalid index.

    numbers=[10,20,30,40]for n inrange(5):print(numbers[n])

    It will produce the following output −

    10
    20
    30
    40
    Traceback (most recent call last):
    
       print (numbers[n])
    IndexError: list index out of range
    

    ModuleNotFoundError

    This is displayed when module could not be found.

    import notamodule
    Traceback (most recent call last):import notamodule
    ModuleNotFoundError: No module named 'notamodule'

    KeyError

    It occurs as dictionary key is not found.

    D1={'1':"aa",'2':"bb",'3':"cc"}print( D1['4'])
    Traceback (most recent call last):
    
       D1['4']
    KeyError:'4'

    ImportError

    It is shown when specified function is not available for import.

    from math import cube
    Traceback (most recent call last):from math import cube
    ImportError: cannot import name 'cube'

    StopIteration

    This error appears when next() function is called after iterator stream exhausts.

    .it=iter([1,2,3])next(it)next(it)next(it)next(it)
    Traceback (most recent call last):next(it)
    StopIteration
    

    TypeError

    This is shown when operator or function is applied to an object of inappropriate type.

    print('2'+2)
    Traceback (most recent call last):'2'+2
    TypeError: must be str,notint

    ValueError

    It is displayed when function’s argument is of inappropriate type.

    print(int('xyz'))
    Traceback (most recent call last):int('xyz')
    ValueError: invalid literal forint()with base 10:'xyz'

    NameError

    This is encountered when object could not be found.

    print(age)
    Traceback (most recent call last):
    
       age
    NameError: name 'age'isnot defined
    

    ZeroDivisionError

    It is shown when second operator in division is zero.

    x=100/0
    Traceback (most recent call last):
    
       x=100/0
    ZeroDivisionError: division by zero
    

    KeyboardInterrupt

    When user hits the interrupt key normally Control-C during execution of program.

    name=input('enter your name')
    enter your name^c
    Traceback (most recent call last):
    
       name=input('enter your name')
    KeyboardInterrupt
    

    Hierarchy of Built-in Exceptions

    The exceptions in Python are organized in a hierarchical structure, with “BaseException” at the top. Here is a simplified hierarchy −

    • BaseException
      • SystemExit
      • KeyboardInterrupt
    • Exception
      • ArithmeticError
        • FloatingPointError
        • OverflowError
        • ZeroDivisionError
      • AttributeError
      • EOFError
      • ImportError
      • LookupError
        • IndexError
        • KeyError
      • MemoryError
      • NameError
        • UnboundLocalError
      • OSError
        • FileNotFoundError
      • TypeError
      • ValueError
      • —(Many others)—

    How to Use Built-in Exceptions

    As we already know that built-in exceptions in Python are pre-defined classes that handle specific error conditions. Now, here is a detailed guide on how to use them effectively in your Python programs −

    Handling Exceptions with try-except Blocks

    The primary way to handle exceptions in Python is using “try-except” blocks. This allows you to catch and respond to exceptions that may occur during the execution of your code.

    Example

    In the following example, the code that may raise an exception is placed inside the “try” block. The “except” block catches the specified exception “ZeroDivisionError” and handles it

    try:
       result =1/0except ZeroDivisionError as e:print(f"Caught an exception: {e}")

    Following is the output obtained −

    Caught an exception: division by zero
    

    Handling Multiple Exceptions

    You can handle multiple exceptions by specifying them in a tuple within the “except” block as shown in the example below −

    try:
       result =int('abc')except(ValueError, TypeError)as e:print(f"Caught a ValueError or TypeError: {e}")

    Output of the above code is as shown below −

    Caught a ValueError or TypeError: invalid literal for int() with base 10: 'abc'
    

    Using “else” and “finally” Blocks

    The “else” block is executed if the code block in the “try” clause does not raise an exception −

    try:
       number =int(input("Enter a number: "))except ValueError as e:print(f"Invalid input: {e}")else:print(f"You entered: {number}")

    Output of the above code varies as per the input given −

    Enter a number: bn
    Invalid input: invalid literal for int() with base 10: 'bn'
    

    The “finally” block is always executed, regardless of whether an exception occurred or not. It’s typically used for clean-up actions, such as closing files or releasing resources −

    try:file=open('example.txt','r')
       content =file.read()except FileNotFoundError as e:print(f"File not found: {e}")finally:file.close()print("File closed.")

    Following is the output of the above code −

    File closed.
    

    Explicitly Raising Built-in Exceptions

    In Python, you can raise built-in exceptions to indicate errors or exceptional conditions in your code. This allows you to handle specific error scenarios and provide informative error messages to users or developers debugging your application.

    Syntax

    Following is the basic syntax for raising built-in exception −

    raise ExceptionClassName("Error message")

    Example

    In this example, the “divide” function attempts to divide two numbers “a” and “b”. If “b” is zero, it raises a “ZeroDivisionError” with a custom message −

    defdivide(a, b):if b ==0:raise ZeroDivisionError("Cannot divide by zero")return a / b
    
    try:
       result = divide(10,0)except ZeroDivisionError as e:print(f"Error: {e}")

    The output obtained is as shown below −

    Error: Cannot divide by zero
  • Python – Warnings

    In Python, a warning is a message that indicates that something unexpected happened while running your code. Unlike an error, a warning will not stop the program from running. Warnings are used to alert the user about potential issues or deprecated features in the code.

    For example, if you are using a deprecated module in your code, you will get a warning message saying that the module is deprecated and will be removed in future versions of Python. But your code may still work as expected.

    Display a Warning Message

    To display a warning message in Python, you can use the warn() function from the warnings module. Here is an example −

    import warnings
    
    # Normal messageprint("TutorialsPoint")# Warning message
    warnings.warn("You got a warning!")

    The output of the above code will be:

    TutorialsPoint
    
    Warnings/Errors:
    /home/cg/root/d732ac89/main.py:7: UserWarning: You got a warning!
      warnings.warn("You got a warning!")
    

    Types of Warnings Classes

    The warning in python is handled by a set of classes based upon the exception handling mechanism. The most common types of warnings are −

    1. UserWarning Class

    The UserWarning is the default warning class in Python. If you have any warning that does not fall into any of the other categories, it will be classified as a UserWarning. To specify a UserWarning, use UserWarning as the second argument to the warn() function. Here is an example −

    import warnings
    
    # Warning message
    warnings.warn("You got a warning!", UserWarning)

    2. DeprecationWarning Class

    The DeprecationWarning is used to indicate that a feature or module is deprecated and will be removed in future versions of Python. To specify a DeprecationWarning, use DeprecationWarning as the second argument to the warn() function. Here is an example −

    import warnings
    
    # Warning message
    warnings.warn("This feature is deprecated!", DeprecationWarning)

    3. SyntaxWarning Class

    The SyntaxWarning is used to indicate that there is a syntax-related issue in the code, but it is not severe enough to raise a SyntaxError. To specify a SyntaxWarning, use SyntaxWarning as the second argument to the warn() function. Here is an example −

    import warnings
    
    # Warning message
    warnings.warn("This is a syntax warning!", SyntaxWarning)# Function with potential syntax issuedeffunc(x):return x is10# using "is" instead of "=="

    4. RuntimeWarning Class

    The RuntimeWarning is a base class used to indicate that there is a doubtful issue related to runtime. To specify a RuntimeWarning, use RuntimeWarning as the second argument to the warn() function. Here is an example −

    import warnings
    
    # Warning message
    warnings.warn("This is a runtime warning!", RuntimeWarning)

    5. ImportWarning Class

    The ImportWarning is used to indicate that there is an issue related to the import of a module. To specify an ImportWarning, use ImportWarning as the second argument to the warn() function. Here is an example −

    import warnings
    
    # Warning message
    warnings.warn("This is an import warning!", ImportWarning)

    Warning Filters

    Warning filters are used to control the behavior of warning messages in Python. For example, if you feel that a warning is severe, you can convert it into an error so that program will stop running. Or, if you feel that a warning is not important, you can ignore it.

    The filterwarnings() function from the warnings module can be used to specify warning filters. It can take following parameters:

    • default − This is the default behavior. It displays the first occurrence of each warning for each location where the warning is issued.
    • always − This option will always display the warning message, even if it has been displayed before.
    • ignore − This option is used to prevent the display of warning messages.
    • error − This option converts the warning into an exception, which will stop the program from running.
    • module − This option will print the first occurrence of matching warnings for each module where the warning is issued.
    • once − This option will print the first occurrence of matching warnings, regardless of the location.

    Example: Turn Warning to an Error

    Here is a simple python code that shows how to turn warnings into errors −

    import warnings
    
    # Turn warning into an error
    warnings.filterwarnings("error", category=UserWarning)try:
        warnings.warn("This is a warning!", UserWarning)except UserWarning as e:print("Caught as error:", e)

    The output of the above code will be −

    Caught as error: This is a warning!
    

    Example: Ignore Warnings

    Here is a simple python code that shows how to ignore warnings −

    import warnings
    
    # Ignore all warnings
    warnings.filterwarnings("ignore")print("Warning message: ")
    warnings.warn("This warning will be ignored!")

    The output of the above code will be:

    Warning message: 
    

    Function Available in Warning Module

    The warnings module has couple of functions that you can use to manage warnings in your Python code. Here are some of the most commonly used functions −

    1. warnings.warn()

    This function is used to issue a warning message. You can specify the warning message and the category of the warning. The syntax of the function is −

    warnings.warn(message, category=None, stacklevel=1, 
                  source=None,*, skip_file_prefixes=())

    Here, message is the warning message you want to display, and category is the type of warning (e.g., UserWarning, DeprecationWarning, etc.).

    The stacklevel argument can be used by wrapper functions written in Python to adjust the stack level of the warning. The skip_file_prefixes keyword argument can be used to indicate which stack frames are ignored when counting stack levels.

    2. warnings.showwarning()

    The showwarning() function is used to write warning messages to a file. Here is the syntax of the function:

    warnings.showwarning(message, category, filename, lineno,file=None, line=None)

    Here, message is the warning message, category is the type of warning, filename is the name of the file where the warning should be saved, lineno is the line number where the warning occurred.

    3. warnings.warn_explicit()

    The warn_explicit() function is used to send a warning message with more control over the warning’s context. It can be used to explicitly pass the message, category, filename and line number, and optionally the module name and the registry. Here is the syntax of the function −

    warnings.warn_explicit(message, category, filename, lineno, module=None, 
                            registry=None, module_globals=None, source=None)

    The parameters have same meaning as in the previous functions.

    4. warnings.filterwarnings()

    The filterwarnings() function is used to set the warning filters. we have already disscussed how to use this function to ignore, always display, or convert warnings into errors. Here is the proper syntax of the function −

    warnings.filterwarnings(action, message='', category=Warning, module='', lineno=0, append=False)

    The parameter “action” can take any of the following values: “default”, “always”, “ignore”, “error”, “module”, or “once”. The other parameters are optional.

    5. warnings.simplefilter()

    The simplefilter() function is a simpler interface to the filterwarnings() function. It is used to set a filter for a specific category of warnings. Here is the syntax of the function −

    warnings.simplefilter(action, category=Warning, lineno=0, append=False)

    The parameters have same meaning as in the previous functions.

    6. warnings.resetwarnings()

    The resetwarnings() function is used to reset the warning filters to their default state. This can be useful if you want to clear any custom warning filters you have set. Here is the syntax of the function −

    warnings.resetwarnings()

    This function does not take any parameters.

    Conclusion

    In this chapter, we learned about warnings in Python. Warnings are different from errors because they will not stop the program from running. It is just used to alert the programmer about potential issues in the code. The warnings module provides a way to issue warning messages and control their behavior.

  • Python – Assertions

    Assertions in Python

    Assertions in Python are statements that assert or assume a condition to be true. If the condition turns out to be false, Python raises an AssertionError exception. They are used to detect programming errors that should never occur if the code is correct.

    • The easiest way to think of an assertion is to liken it to a raise-if statement (or to be more accurate, a raise-if-not statement). An expression is tested, and if the result comes up false, an exception is raised.
    • Assertions are carried out by the assert statement, the newest keyword to Python, introduced in version 1.5.
    • Programmers often place assertions at the start of a function to check for valid input, and after a function call to check for valid output.

    The assert Statement

    In Python, assertions use the assert keyword followed by an expression. If the expression evaluates to False, an AssertionError is raised. Following is the syntax of assertion −

    assert condition, message
    

    Where,

    • condition − A boolean expression that should be true.
    • message (optional) − An optional message to be displayed if the assertion fails.

    Using Assertions

    Assertions are generally used during development and testing phases to check conditions that should always hold true.

    Example

    In the following example, we are using assertions to ensure that the variable “num” falls within the valid range of “0” to “100”. If the assertion fails, Python raises an “AssertionError”, preventing further execution of the subsequent print statement −

    print('Enter marks out of 100:')
    num =75assert num >=0and num <=100print('Marks obtained:', num)
    
    num =125assert num >=0and num <=100print('Marks obtained:', num)# This line won't be reached if assertion fails

    Following is the output of the above code −

    Enter marks out of 100:
    Marks obtained: 75
    Traceback (most recent call last):
      File "/home/cg/root/66723bd115007/main.py", line 7, in <module>
        assert num >= 0 and num <= 100
    AssertionError
    

    Custom Error Messages

    To display a custom error message when an assertion fails, include a string after the expression in the assert statement −

    assert num >=0and num <=100,"Only numbers in the range 0-100 are accepted"

    Handling AssertionError

    Assertions can be caught and handled like any other exception using a try-except block. If they are not handled, they will terminate the program and produce a traceback −

    try:
       num =int(input('Enter a number: '))assert num >=0,"Only non-negative numbers are accepted"print(num)except AssertionError as msg:print(msg)

    It will produce the following output −

    Enter a number: -87
    Only non-negative numbers are accepted
    

    Assertions vs. Exceptions

    Assertions are used to check internal state and invariants that should always be true. Whereas, exceptions helps in handling runtime errors and exceptional conditions that may occur during normal execution.

    Assertions are disabled by default in Python’s optimized mode (-O or python -O script.py). Therefore, they should not be used to enforce constraints that are required for the correct functioning of the program in production environments.

  • Python – Logging

    Logging in Python

    Logging is the process of recording messages during the execution of a program to provide runtime information that can be useful for monitoring, debugging, and auditing.

    In Python, logging is achieved through the built-in logging module, which provides a flexible framework for generating log messages.

    Benefits of Logging

    Following are the benefits of using logging in Python −

    • Debugging − Helps identify and diagnose issues by capturing relevant information during program execution.
    • Monitoring − Provides insights into the application’s behavior and performance.
    • Auditing − Keeps a record of important events and actions for security purposes.
    • Troubleshooting − Facilitates tracking of program flow and variable values to understand unexpected behavior.

    Components of Python Logging

    Python logging consists of several key components that work together to manage and output log messages effectively −

    • Logger − It is the main entry point that you use to emit log messages. Each logger instance is named and can be configured independently.
    • Handler − It determines where log messages are sent. Handlers send log messages to different destinations such as the console, files, sockets, etc.
    • Formatter − It specifies the layout of log messages. Formatters define the structure of log records by specifying which information to include (e.g., timestamp, log level, message).
    • Logger Level − It defines the severity level of log messages. Messages below this level are ignored. Common levels include DEBUG, INFO, WARNING, ERROR, and CRITICAL.
    • Filter − It is the optional components that provide finer control over which log records are processed and emitted by a handler.

    Logging Levels

    Logging levels in Python define the severity of log messages, allowing developers to categorize and filter messages based on their importance. Each logging level has a specific purpose and helps in understanding the significance of the logged information −

    • DEBUG − Detailed information, typically useful only for debugging purposes. These messages are used to trace the flow of the program and are usually not seen in production environments.
    • INFO − Confirmation that things are working as expected. These messages provide general information about the progress of the application.
    • WARNING − Indicates potential issues that do not prevent the program from running but might require attention. These messages can be used to alert developers about unexpected situations.
    • ERROR − Indicates a more serious problem that prevents a specific function or operation from completing successfully. These messages highlight errors that need immediate attention but do not necessarily terminate the application.
    • CRITICAL − The most severe level, indicating a critical error that may lead to the termination of the program. These messages are reserved for critical failures that require immediate intervention.

    Usage

    Following are the usage scenarios for each logging level in Python applications −

    Choosing the Right Level − Selecting the appropriate logging level ensures that log messages provide relevant information without cluttering the logs.

    Setting Levels − Loggers, handlers, and specific log messages can be configured with different levels to control which messages are recorded and where they are outputted.

    Hierarchy − Logging levels are hierarchical, meaning that setting a level on a logger also affects the handlers and log messages associated with it.

    Basic Logging Example

    Following is a basic logging example in Python to demonstrate its usage and functionality −

    import logging
    
    # Configure logging
    logging.basicConfig(level=logging.DEBUG,format='%(asctime)s - %(levelname)s - %(message)s')# Example usagedefcalculate_sum(a, b):
       logging.debug(f"Calculating sum of {a} and {b}")
       result = a + b
       logging.info(f"Sum calculated successfully: {result}")return result
    
    # Main programif __name__ =="__main__":
       logging.info("Starting the program")
       result = calculate_sum(10,20)
       logging.info("Program completed")

    Output

    Following is the output of the above code −

    2024-06-19 09:00:06,774 - INFO - Starting the program
    2024-06-19 09:00:06,774 - DEBUG - Calculating sum of 10 and 20
    2024-06-19 09:00:06,774 - INFO - Sum calculated successfully: 30
    2024-06-19 09:00:06,775 - INFO - Program completed
    

    Configuring Logging

    Configuring logging in Python refers to setting up various components such as loggers, handlers, and formatters to control how and where log messages are stored and displayed. This configuration allows developers to customize logging behavior according to their application’s requirements and deployment environment.

    Example

    In the following example, the getLogger() function retrieves or creates a named logger. Loggers are organized hierarchically based on their names. Then, handlers like “StreamHandler” (console handler) are created to define where log messages go. They can be configured with specific log levels and formatters.

    The formatters specify the layout of log records, determining how log messages appear when printed or stored −

    import logging
    
    # Create logger
    logger = logging.getLogger('my_app')
    logger.setLevel(logging.DEBUG)# Set global log level# Create console handler and set level to debug
    console_handler = logging.StreamHandler()
    console_handler.setLevel(logging.DEBUG)# Create formatter
    formatter = logging.Formatter('%(asctime)s - %(name)s - %(levelname)s - %(message)s')
    console_handler.setFormatter(formatter)# Add console handler to logger
    logger.addHandler(console_handler)# Example usage
    logger.debug('This is a debug message')
    logger.info('This is an info message')
    logger.warning('This is a warning message')
    logger.error('This is an error message')
    logger.critical('This is a critical message')

    The result produced is as shown below −

    2024-06-19 09:05:20,852 - my_app - DEBUG - This is a debug message
    2024-06-19 09:05:20,852 - my_app - INFO - This is an info message
    2024-06-19 09:05:20,852 - my_app - WARNING - This is a warning message
    2024-06-19 09:05:20,852 - my_app - ERROR - This is an error message
    2024-06-19 09:05:20,852 - my_app - CRITICAL - This is a critical message
    

    Logging Handlers

    Logging handlers in Python determine where and how log messages are processed and outputted. They play an important role in directing log messages to specific destinations such as the console, files, email, databases, or even remote servers.

    Each handler can be configured independently to control the format, log level, and other properties of the messages it processes.

    Types of Logging Handlers

    Following are the various types of logging handlers in Python −

    • StreamHandler − Sends log messages to streams such as sys.stdout or sys.stderr. Useful for displaying log messages in the console or command line interface.
    • FileHandler − Writes log messages to a specified file on the file system. Useful for persistent logging and archiving of log data.
    • RotatingFileHandler − Similar to FileHandler but automatically rotates log files based on size or time intervals. Helps manage log file sizes and prevent them from growing too large.
    • SMTPHandler − Sends log messages as emails to designated recipients via SMTP. Useful for alerting administrators or developers about critical issues.
    • SysLogHandler − Sends log messages to the system log on Unix-like systems (e.g., syslog). Allows integration with system-wide logging facilities.
    • MemoryHandler − Buffers log messages in memory and sends them to a target handler after reaching a certain buffer size or timeout. Useful for batching and managing bursts of log messages.
    • HTTPHandler − Sends log messages to a web server via HTTP or HTTPS. Enables logging messages to a remote server or logging service.
  • Python – User-Defined Exceptions

    User-Defined Exceptions in Python

    User-defined exceptions in Python are custom error classes that you create to handle specific error conditions in your code. They are derived from the built-in Exception class or any of its sub classes.

    User-defined exceptions provide more precise control over error handling in your application −

    • Clarity − They provide specific error messages that make it clear what went wrong.
    • Granularity − They allow you to handle different error conditions separately.
    • Maintainability − They centralize error handling logic, making your code easier to maintain.

    How to Create a User-Defined Exception

    To create a user-defined exception, follow these steps −

    Step 1 − Define the Exception Class

    Create a new class that inherits from the built-in “Exception” class or any other appropriate base class. This new class will serve as your custom exception.

    classMyCustomError(Exception):pass

    Explanation

    • Inheritance − By inheriting from “Exception”, your custom exception will have the same behaviour and attributes as the built-in exceptions.
    • Class Definition − The class is defined using the standard Python class syntax. For simple custom exceptions, you can define an empty class body using the “pass” statement.

    Step 2 − Initialize the Exception

    Implement the “__init__” method to initialize any attributes or provide custom error messages. This allows you to pass specific information about the error when raising the exception.

    classInvalidAgeError(Exception):def__init__(self, age, message="Age must be between 18 and 100"):
          self.age = age
          self.message = message
          super().__init__(self.message)

    Explanation

    • Attributes − Define attributes such as “age” and “message” to store information about the error.
    • Initialization − The “__init__” method initializes these attributes. The “super().__init__(self.message)” call ensures that the base “Exception” class is properly initialized with the error message.
    • Default Message − A default message is provided, but you can override it when raising the exception.

    Step 3 − Optionally Override “__str__” or “__repr__”

    Override the “__str__” or “__repr__” method to provide a custom string representation of the exception. This is useful for printing or logging the exception.

    classInvalidAgeError(Exception):def__init__(self, age, message="Age must be between 18 and 100"):
          self.age = age
          self.message = message
          super().__init__(self.message)def__str__(self):returnf"{self.message}. Provided age: {self.age}"

    Explanation

    • __str__ Method − The “__str__” method returns a string representation of the exception. This is what will be displayed when the exception is printed.
    • Custom Message − Customize the message to include relevant information, such as the provided age in this example.

    Raising User-Defined Exceptions

    Once you have defined a custom exception, you can raise it in your code to signify specific error conditions. Raising user-defined exceptions involves using the raise statement, which can be done with or without custom messages and attributes.

    Syntax

    Following is the basic syntax for raising an exception −

    raise ExceptionType(args)

    Example

    In this example, the “set_age” function raises an “InvalidAgeError” if the age is outside the valid range −

    defset_age(age):if age <18or age >100:raise InvalidAgeError(age)print(f"Age is set to {age}")

    Handling User-Defined Exceptions

    Handling user-defined exceptions in Python refers to using “try-except” blocks to catch and respond to the specific conditions that your custom exceptions represent. This allows your program to handle errors gracefully and continue running or to take specific actions based on the type of exception raised.

    Syntax

    Following is the basic syntax for handling exceptions −

    try:# Code that may raise an exceptionexcept ExceptionType as e:# Code to handle the exception

    Example

    In the below example, the “try” block calls “set_age” with an invalid age. The “except” block catches the “InvalidAgeError” and prints the custom error message −

    try:
       set_age(150)except InvalidAgeError as e:print(f"Invalid age: {e.age}. {e.message}")

    Complete Example

    Combining all the steps, here is a complete example of creating and using a user-defined exception −

    classInvalidAgeError(Exception):def__init__(self, age, message="Age must be between 18 and 100"):
          self.age = age
          self.message = message
          super().__init__(self.message)def__str__(self):returnf"{self.message}. Provided age: {self.age}"defset_age(age):if age <18or age >100:raise InvalidAgeError(age)print(f"Age is set to {age}")try:
       set_age(150)except InvalidAgeError as e:print(f"Invalid age: {e.age}. {e.message}")

    Following is the output of the above code −

    Invalid age: 150. Age must be between 18 and 100
  • Python – Nested try Block

    Nested try Block in Python

    In a Python program, if there is another try-except construct either inside either a try block or inside its except block, it is known as a nested-try block. This is needed when different blocks like outer and inner may cause different errors. To handle them, we need nested try blocks.

    We start with an example having a single “try − except − finally” construct. If the statements inside try encounter exception, it is handled by except block. With or without exception occurred, the finally block is always executed.

    Example 1

    Here, the try block has “division by 0” situation, hence the except block comes into play. It is equipped to handle the generic exception with Exception class.

    a=10
    b=0try:print(a/b)except Exception:print("General Exception")finally:print("inside outer finally block")

    It will produce the following output −

    General Exception
    inside outer finally block
    

    Example 2

    Let us now see how to nest the try constructs. We put another “try − except − finally” blocks inside the existing try block. The except keyword for inner try now handles generic Exception, while we ask the except block of outer try to handle ZeroDivisionError.

    Since exception doesn’t occur in the inner try block, its corresponding generic Except isn’t called. The division by 0 situation is handled by outer except clause.

    a=10
    b=0try:print(a/b)try:print("This is inner try block")except Exception:print("General exception")finally:print("inside inner finally block")except ZeroDivisionError:print("Division by 0")finally:print("inside outer finally block")

    It will produce the following output −

    Division by 0
    inside outer finally block
    

    Example 3

    Now we reverse the situation. Out of the nested try blocks, the outer one doesn’t have any exception raised, but the statement causing division by 0 is inside inner try, and hence the exception handled by inner except block. Obviously, the except part corresponding to outer try: will not be called upon.

    a=10
    b=0try:print("This is outer try block")try:print(a/b)except ZeroDivisionError:print("Division by 0")finally:print("inside inner finally block")except Exception:print("General Exception")finally:print("inside outer finally block")

    It will produce the following output −

    This is outer try block
    Division by 0
    inside inner finally block
    inside outer finally block
    

    In the end, let us discuss another situation which may occur in case of nested blocks. While there isn’t any exception in the outer try:, there isn’t a suitable except block to handle the one inside the inner try: block.

    Example 4

    In the following example, the inner try: faces “division by 0”, but its corresponding except: is looking for KeyError instead of ZeroDivisionError. Hence, the exception object is passed on to the except: block of the subsequent except statement matching with outer try: statement. There, the zeroDivisionError exception is trapped and handled.

    a=10
    b=0try:print("This is outer try block")try:print(a/b)except KeyError:print("Key Error")finally:print("inside inner finally block")except ZeroDivisionError:print("Division by 0")finally:print("inside outer finally block")

    It will produce the following output −

    This is outer try block
    inside inner finally block
    Division by 0
    inside outer finally block
  • Python – Exception Chaining

    Exception Chaining

    Exception chaining is a technique of handling exceptions by re-throwing a caught exception after wrapping it inside a new exception. The original exception is saved as a property (such as cause) of the new exception.

    During the handling of one exception ‘A’, it is possible that another exception ‘B’ may occur. It is useful to know about both exceptions in order to debug the problem. Sometimes it is useful for an exception handler to deliberately re-raise an exception, either to provide extra information or to translate an exception to another type.

    In Python 3.x, it is possible to implement exception chaining. If there is any unhandled exception inside an except section, it will have the exception being handled attached to it and included in the error message.

    Example

    In the following code snippet, trying to open a non-existent file raises FileNotFoundError. It is detected by the except block. While handling another exception is raised.

    try:open("nofile.txt")except OSError:raise RuntimeError("unable to handle error")

    It will produce the following output −

    Traceback (most recent call last):
      File "/home/cg/root/64afcad39c651/main.py", line 2, in <module>
    open("nofile.txt")
    FileNotFoundError: [Errno 2] No such file or directory: 'nofile.txt'
    
    During handling of the above exception, another exception occurred:
    
    Traceback (most recent call last):
      File "/home/cg/root/64afcad39c651/main.py", line 4, in <module>
        raise RuntimeError("unable to handle error")
    RuntimeError: unable to handle error
    

    The raise . . from Statement

    If you use an optional from clause in the raise statement, it indicates that an exception is a direct consequence of another. This can be useful when you are transforming exceptions. The token after from keyword should be the exception object.

    try:open("nofile.txt")except OSError as exc:raise RuntimeError from exc
    

    It will produce the following output −

    Traceback (most recent call last):
      File "/home/cg/root/64afcad39c651/main.py", line 2, in <module>
        open("nofile.txt")
    FileNotFoundError: [Errno 2] No such file or directory: 'nofile.txt'
    
    The above exception was the direct cause of the following exception:
    
    Traceback (most recent call last):
      File "/home/cg/root/64afcad39c651/main.py", line 4, in <module>
        raise RuntimeError from exc
    RuntimeError
    

    The raise . . from None Statement

    If we use None in from clause instead of exception object, the automatic exception chaining that was found in the earlier example is disabled.

    try:open("nofile.txt")except OSError as exc:raise RuntimeError fromNone

    It will produce the following output −

    Traceback (most recent call last):
     File "C:\Python311\hello.py", line 4, in <module>
      raise RuntimeError from None
    RuntimeError
    

    The __context__ and __cause__ Expression

    Raising an exception in the except block will automatically add the captured exception to the __context__ attribute of the new exception. Similarly, you can also add __cause__ to any exception using the expression raise … from syntax.

    try:try:raise ValueError("ValueError")except ValueError as e1:raise TypeError("TypeError")from e1
    except TypeError as e2:print("The exception was",repr(e2))print("Its __context__ was",repr(e2.__context__))print("Its __cause__ was",repr(e2.__cause__))

    It will produce the following output −

    The exception was TypeError('TypeError')
    Its __context__ was ValueError('ValueError')
    Its __cause__ was ValueError('ValueError')
  • Python – Raising Exceptions

    Raising Exceptions in Python

    In Python, you can raise exceptions explicitly using the raise statement. Raising exceptions allows you to indicate that an error has occurred and to control the flow of your program by handling these exceptions appropriately.

    Raising an exception refers to explicitly trigger an error condition in your program. This can be useful for handling situations where the normal flow of your program cannot continue due to an error or an unexpected condition.

    In Python, you can raise built-in exceptions like ValueError or TypeError to indicate common error conditions. Additionally, you can create and raise custom exceptions.

    Raising Built-in Exceptions

    You can raise any built-in exception by creating an instance of the exception class and using the raise statement. Following is the syntax −

    raise Exception("This is a general exception")

    Example

    Here is an example where we raise a ValueError when a function receives an invalid argument −

    defdivide(a, b):if b ==0:raise ValueError("Cannot divide by zero")return a / b
    
    try:
       result = divide(10,0)except ValueError as e:print(e)

    Following is the output of the above code −

    Cannot divide by zero
    

    Raising Custom Exceptions

    In addition to built-in exceptions, you can define and raise your own custom exceptions by creating a new exception class that inherits from the base Exception class or any of its subclasses −

    classMyCustomError(Exception):passdefrisky_function():raise MyCustomError("Something went wrong in risky_function")try:
       risky_function()except MyCustomError as e:print(e)

    Output of the above code is as shown below −

    Something went wrong in risky_function
    

    Creating Custom Exceptions

    Custom exceptions is useful for handling specific error conditions that are unique to your application, providing more precise error reporting and control.

    To create a custom exception in Python, you define a new class that inherits from the built-in Exception class or any other appropriate built-in exception class. This custom exception class can have additional attributes and methods to provide more detailed context about the error condition.

    Example

    In this example −

    • We define a custom exception class “InvalidAgeError” that inherits from “Exception”.
    • The __init__() method initializes the exception with the invalid age and a default error message.
    • The set_age() function raises “InvalidAgeError” if the provided age is outside the valid range.
    classInvalidAgeError(Exception):def__init__(self, age, message="Age must be between 18 and 100"):
          self.age = age
          self.message = message
          super().__init__(self.message)defset_age(age):if age <18or age >100:raise InvalidAgeError(age)print(f"Age is set to {age}")try:
       set_age(150)except InvalidAgeError as e:print(f"Invalid age: {e.age}. {e.message}")

    The result obtained is as shown below −

    Invalid age: 150. Age must be between 18 and 100
    

    Re-Raising Exceptions

    Sometimes, you may need to catch an exception, perform specific actions (such as logging, cleanup, or providing additional context), and then re-raise the same exception to be handled further up the call stack

    This is useful when you want to ensure certain actions are taken when an exception occurs, but still allow the exception to propagate for higher-level handling.

    To re-raise an exception in Python, you use the “raise” statement without specifying an exception, which will re-raise the last exception that was active in the current scope.

    Example

    In the following example −

    • The process_file() function attempts to open and read a file.
    • If the file is not found, it prints an error message and re-raises the “FileNotFoundError” exception.
    • The exception is then caught and handled at a higher level in the call stack.
    defprocess_file(filename):try:withopen(filename,"r")asfile:
             data =file.read()# Process dataexcept FileNotFoundError as e:print(f"File not found: {filename}")# Re-raise the exceptionraisetry:
       process_file("nonexistentfile.txt")except FileNotFoundError as e:print("Handling the exception at a higher level")

    After executing the above code, we get the following output −

    File not found: nonexistentfile.txt
    Handling the exception at a higher level
  • Python – The try-finally Block

    Python Try-Finally Block

    In Python, the try-finally block is used to ensure that certain code executes, regardless of whether an exception is raised or not. Unlike the try-except block, which handles exceptions, the try-finally block focuses on cleanup operations that must occur, ensuring resources are properly released and critical tasks are completed.

    Syntax

    The syntax of the try-finally statement is as follows −

    try:# Code that might raise exceptions
       risky_code()finally:# Code that always runs, regardless of exceptions
       cleanup_code()

    In Python, when using exception handling with try blocks, you have the option to include either except clauses to catch specific exceptions or a finally clause to ensure certain cleanup operations are executed, but not both together.

    Example

    Let us consider an example where we want to open a file in write mode (“w”), writes some content to it, and ensures the file is closed regardless of success or failure using a finally block −

    try:
       fh =open("testfile","w")
       fh.write("This is my test file for exception handling!!")finally:print("Error: can\'t find file or read data")
       fh.close()

    If you do not have permission to open the file in writing mode, then it will produce the following output −

    Error: can't find file or read data
    

    The same example can be written more cleanly as follows −

    try:
       fh =open("testfile","w")try:
          fh.write("This is my test file for exception handling!!")finally:print("Going to close the file")
          fh.close()except IOError:print("Error: can\'t find file or read data")

    When an exception is thrown in the try block, the execution immediately passes to the finally block. After all the statements in the finally block are executed, the exception is raised again and is handled in the except statements if present in the next higher layer of the try-except statement.

    Exception with Arguments

    An exception can have an argument, which is a value that gives additional information about the problem. The contents of the argument vary by exception. You capture an exception’s argument by supplying a variable in the except clause as follows −

    try:
       You do your operations here
       ......................except ExceptionType as Argument:
       You can print value of Argument here...

    If you write the code to handle a single exception, you can have a variable follow the name of the exception in the except statement. If you are trapping multiple exceptions, you can have a variable follow the tuple of the exception.

    This variable receives the value of the exception mostly containing the cause of the exception. The variable can receive a single value or multiple values in the form of a tuple. This tuple usually contains the error string, the error number, and an error location.

    Example

    Following is an example for a single exception −

    # Define a function here.deftemp_convert(var):try:returnint(var)except ValueError as Argument:print("The argument does not contain numbers\n",Argument)# Call above function here.
    temp_convert("xyz")

    It will produce the following output −

    The argument does not contain numbers
    invalid literal for int() with base 10: 'xyz'