Author: admin

  • Multilevel Inheritance in C++

    Multilevel inheritance is a type of inheritance, where a class is derived from another derived class, creating a chain of inheritance that allows it to pass down its properties and behaviors through multiple levels of classes or inherit from its predecessor.

    Implementing Multilevel Inheritance

    To implement multilevel inheritance, define classes in a hierarchical manner, where one class inherits from another.

    Syntax

    The syntax of multilevel inheritance in C++ −

    classbaseClass{//Here's a base class members};classderivedClass1:public baseClass{// Members of derivedClass1};classderivedClass2:public derivedClass1{// Members of derivedClass2};

    Here,

    • baseClass is the top-level class from where other classes derive.
    • derivedClass1 is the class that inherits from baseClass.
    • derivedClass2 Inherits from derivedClass1, creating a multilevel structure.

    Block Diagram of Multilevel Inheritance

    See the below block diagram demonstrating multilevel inheritance −

    C++ Multilevel Inheritance

    As per the above diagram, “Shape” is the base class, and it is deriving over to “Polygon” class, and “Polygon” class is further deriving over “Triangle” class in order to implement multilevel inheritance.

    Example of Multilevel Inheritance

    In the following example, we are implementing multilevel inheritance −

    #include <iostream>usingnamespace std;// Base classclassShape{public:voiddisplay(){
             cout <<"This is a shape."<< endl;}};// First derived classclassPolygon:public Shape{public:voidsides(){
             cout <<"A polygon has multiple sides."<< endl;}};// Second derived classclassTriangle:public Polygon{public:voidtype(){
             cout <<"A triangle comes under a three-sided polygon."<< endl;}};intmain(){
       Triangle myTriangle;
    
       myTriangle.display();// From Shape
       myTriangle.sides();// From Polygon
       myTriangle.type();// From Trianglereturn0;}

    Output

    This is a shape.
    A polygon has multiple sides.
    A triangle comes under a three-sided polygon.
    

    Explanation

    • Firstly, a base class named Shape has been created with a public method display(), which prints “This is a shape.”
    • Next, the first derived class named Polygon inherits from the Shape (or base class), meaning it gains access to the members of the Shape class, including the display()
    • The second derived class, named Triangle, inherits from the Polygon class, which allows Triangle to use both display() and sides() methods.

    Main Function

    • An instance of a Triangle named myTriangle is created.
    • display() will first access the display() method by calling the Triangle class and then the Shape class because of inheritance.
    • Similarly, sides() will inherit from sides() of the Polygon class,
    • and myTriangle.type() from type() of Triangle class
  • Multiple Inheritance in C++

    Multiple inheritance in C++ is a feature that allows a class to inherit from more than one base class, which means a derived class can have multiple parent classes and inherit attributes and behaviors from all the base classes.

    Implementing Multiple Inheritance

    To implement multiple inheritance, you need to specify multiple base classes in the derived class and declare it using a comma-separated list.

    Syntax

    The syntax of multiple inheritance in C++ is −

    classBase1{// Base class 1 members};classBase2{// Base class 2 members};classDerived:public Base1, public Base2{// Derived class members};

    Block Diagram of Multiple Inheritance

    See the below block diagram demonstrating multiple inheritance −

    C++ Multiple Inheritance

    As per the above diagram, classes “Car” and “Boat” are the base classes and they are deriving over “DualModeVehicle” class in order to implement multiple inheritance.

    Example of Multiple Inheritance

    In the following example, there are two base classes, “Car” and “Boat”, and one derived class, which is “DualModeVehicle”. Both of the base classes are inherited by the derived class.

    #include <iostream>usingnamespace std;// Base class 1classCar{public:voiddrive(){
             cout <<"Driving on land"<< endl;}};// Base class 2classBoat{public:voidsail(){
             cout <<"Sailing on water"<< endl;}};// Derived classclassDualModeVehicle:public Car, public Boat{public:voiduse(){drive();// Calls the drive function from Carsail();// Calls the sail function from Boat}};intmain(){
       DualModeVehicle myVehicle;
       myVehicle.use();// Demonstrates both functionalitiesreturn0;}

    Output

    Driving on land
    Sailing on water
    

    Explanation

    • Class Car is our first base class with public member function drive(), whereas class boat is the second base class with public member function sail().
    • Now a derived class named DualModeVehicle, which inherits from both Car and Boat and uses multiple inheritance to combine the functionalities of both base classes.
    • Where it has a public member function use(), which calls the drive() method from the Car class and the sail() method from the Boat class.

    Main function

    • Now here, an instance of DualModeVehicle, named myVehicle, is created.
    • where the use() method of myVehicle is called, which in turn calls both drive() and sail().
    • returns 0 indicates successful execution.

    Challenges in Multiple Inheritance

    Multiple inheritance in C++ allows a class to inherit from more than one base class which provides flexibility and reusability. However, it also introduces several challenges, discussed below −

    • Ambiguity − When two or more base classes have members with the same name cause ambiguity.
    • Diamond problem − It arises when a class inherits from two classes that both inherit from a common base class which causes ambiguity and conflicts due to multiple copies of the base class, which is ultimately known as the Diamond problem.

    Ambiguity in Multiple Inheritance

    If two or more base classes have members (functions or variables) with the same name, the compiler won’t be able to decide which one to use, which ultimately leads to ambiguity.

    This can be resolved using scope resolution.

    Syntax

    classBase1{public:voidshow(){ cout <<"Base1 show"<< endl;}};classBase2{public:voidshow(){ cout <<"Base2 show"<< endl;}};classDerived:public Base1, public Base2{public:voidshow(){Base1::show();// Explicitly calls Base1's showBase2::show();// Explicitly calls Base2's show}};

    Handling Ambiguity in Multiple Inheritance

    Here we will demonstrate how to handle ambiguity in multiple inheritance by using explicit scope resolution to specify which base class’s method should be called.

    Example

    Lets consider it with an example

    #include <iostream>usingnamespace std;classBase1{public:voidshow(){
             cout <<"Base1 show"<< endl;}};classBase2{public:voidshow(){
             cout <<"Base2 show"<< endl;}};classDerived:public Base1, public Base2{public:voidshow(){// Ambiguity occurs here because both Base1 and Base2 have a show() methodBase1::show();// Explicitly calls Base1's showBase2::show();// Explicitly calls Base2's show}};intmain(){
       Derived obj;
       obj.show();// Calls Derived show() method, which resolves ambiguityreturn0;}

    Output

    Base1 show
    Base2 show
    

    In int main() body, we had called Deriveds show() method, which resolved the ambiguity.

    Diamond Problem in Multiple Inheritance

    A diamond problem in C++ occurs when a class inherits from two classes that both inherit from a common base class, which ultimately creates ambiguity in the inheritance hierarchy as the derived class now has two copies of the common base class, leading to conflicts.

    Example

    #include <iostream>usingnamespace std;classBase{public:voidshow(){
             cout <<"Base show"<< endl;}};classDerived1:public Base{};classDerived2:public Base{};classFinal:public Derived1, public Derived2{};intmain(){
       Final obj;// obj.show(); // This line will cause ambiguityreturn0;}

    Diamond Problem Solution in Multiple Inheritance

    The primary solution for the Diamond Problem in C++ is to use virtual inheritance.

    Example

    #include <iostream>usingnamespace std;classBase{public:voidshow(){
             cout <<"Base show"<< endl;}};classDerived1:virtual public Base{};// Virtual inheritanceclassDerived2:virtual public Base{};// Virtual inheritanceclassFinal:public Derived1, public Derived2{};intmain(){
       Final obj;
       obj.show();// Now this calls Base's show() without ambiguityreturn0;}

    Output

    Base show
    

    By using virtual inheritance, we can avoid the Diamond problem challenge, which ensures that only one instance of the base class exists in the derived class hierarchy.

    Benefits of Using Multiple Inheritance

    • Code reusability, as it allows developers to use existing classes to create new classes with combined functionalities.
    • It models real-world entities more accurately, where a derived class may have characteristics of multiple base classes.
    • It enables a more flexible and modular design.
  • C++ Inheritance

    One of the most important concepts in object-oriented programming is that of inheritance. Inheritance allows us to define a class in terms of another class, which makes it easier to create and maintain an application. This also provides an opportunity to reuse the code functionality and fast implementation time.

    When creating a class, instead of writing completely new data members and member functions, the programmer can designate that the new class should inherit the members of an existing class. This existing class is called the base class, and the new class is referred to as the derived class.

    The idea of inheritance implements the is a relationship. For example, mammal IS-A animal, dog IS-A mammal hence dog IS-A animal as well and so on.

    Base and Derived Classes

    A class can be derived from more than one classes, which means it can inherit data and functions from multiple base classes. To define a derived class, we use a class derivation list to specify the base class(es). A class derivation list names one or more base classes and has the form −

    classderived-class: access-specifier base-class

    Where access-specifier is one of public, protected, or private, and base-class is the name of a previously defined class. If the access-specifier is not used, then it is private by default.

    Consider a base class Shape and its derived class Rectangle as follows −

    #include <iostream>usingnamespace std;// Base classclassShape{public:voidsetWidth(int w){
             width = w;}voidsetHeight(int h){
             height = h;}protected:int width;int height;};// Derived classclassRectangle:public Shape{public:intgetArea(){return(width * height);}};intmain(void){
       Rectangle Rect;
     
       Rect.setWidth(5);
       Rect.setHeight(7);// Print the area of the object.
       cout <<"Total area: "<< Rect.getArea()<< endl;return0;}

    When the above code is compiled and executed, it produces the following result −

    Total area: 35
    

    Access Control and Inheritance

    A derived class can access all the non-private members of its base class. Thus base-class members that should not be accessible to the member functions of derived classes should be declared private in the base class.

    We can summarize the different access types according to – who can access them in the following way −

    Accesspublicprotectedprivate
    Same classyesyesyes
    Derived classesyesyesno
    Outside classesyesnono

    A derived class inherits all base class methods with the following exceptions −

    • Constructors, destructors and copy constructors of the base class.
    • Overloaded operators of the base class.
    • The friend functions of the base class.

    Type of Inheritance

    When deriving a class from a base class, the base class may be inherited through public, protected or private inheritance. The type of inheritance is specified by the access-specifier as explained above.

    We hardly use protected or private inheritance, but public inheritance is commonly used. While using different type of inheritance, following rules are applied −

    • Public Inheritance − When deriving a class from a public base class, public members of the base class become public members of the derived class and protected members of the base class become protected members of the derived class. A base class’s private members are never accessible directly from a derived class, but can be accessed through calls to the public and protected members of the base class.
    • Protected Inheritance − When deriving from a protected base class, public and protected members of the base class become protected members of the derived class.
    • Private Inheritance − When deriving from a private base class, public and protected members of the base class become private members of the derived class.

    Multiple Inheritance

    A C++ class can inherit members from more than one class using multiple inheritance. Multiple inheritance is a feature that allows a class to inherit from more than one base class, which means a derived class can have multiple parent classes and inherit attributes and behaviors from all the base classes.

    and here is the extended syntax −

    class derived-class: access baseA, access baseB....
    

    Where access is one of public, protected, or private and would be given for every base class and they will be separated by comma as shown above. Let us try the following example −

    #include <iostream>usingnamespace std;// Base class ShapeclassShape{public:voidsetWidth(int w){
             width = w;}voidsetHeight(int h){
             height = h;}protected:int width;int height;};// Base class PaintCostclassPaintCost{public:intgetCost(int area){return area *70;}};// Derived classclassRectangle:public Shape, public PaintCost{public:intgetArea(){return(width * height);}};intmain(void){
       Rectangle Rect;int area;
     
       Rect.setWidth(5);
       Rect.setHeight(7);
    
       area = Rect.getArea();// Print the area of the object.
       cout <<"Total area: "<< Rect.getArea()<< endl;// Print the total cost of painting
       cout <<"Total paint cost: $"<< Rect.getCost(area)<< endl;return0;}

    When the above code is compiled and executed, it produces the following result −

    Total area: 35
    Total paint cost: $2450
  • Virtual Destructor in C++

    virtual destructor is a destructor declared within the base class with the virtual keyword. When deleting a derived class object using a pointer to a base class, the base class should be defined with a virtual destructor.

    Virtual destructors help prevent the problem of memory leaks and undefined behavior. If a virtual destructor is not used, then only the base class destructor is called, and the resources of derived class is not cleaned up.

    The Syntax for declaring a virtual destructor is given below −

    classBase{public:virtual~Base(){// base class destructor}};

    Example

    The following example demonstrates how to use a virtual destructor. The virtual destructor calls the destructor of both classes i.e. base and child class −

    #include <iostream>usingnamespace std;classBase{public:Base(){
    		cout <<"Base Constructor\n";}virtual~Base(){
    		cout <<"Base Destructor\n";}};classDerived:public Base{public:Derived(){
    		cout <<"Derived Constructor\n";}~Derived(){
    		cout <<"Derived Destructor\n";}};intmain(){
    	Base *basePtr =newDerived();delete basePtr;return0;}

    The output of the above code is given below −

    Base Constructor
    Derived Constructor
    Derived Destructor
    Base Destructor
    

    Why We Need Virtual Destructors?

    Given below are the reasons why virtual destructors are needed −

    • When you do not use a virtual base class destructor while deleting a derived class object, it results in undefined behavior.
    • Virtual destructors make sure to delete the object of derived class too while deleting the base class object.
    • It avoids memory leak.
    • Virtual destructors maintain the order of execution of destructors i.e., first derived class, then base class.

    Example: Non-Virtual Destructor

    In the following example, the virtual destructor is not used. In the output, it can be observed that only the base class destructor has been called and the destructor of derived class is skipped.

    #include <iostream>usingnamespace std;classBase{public:// Non-virtual destructor~Base(){
    		cout <<"Base class destructor called.\n";}};classDerived:public Base{public:~Derived(){
    		cout <<"Derived class destructor also called.\n";}};intmain(){
    	Base* ptr =newDerived();// Only Base destructor will be calleddelete ptr;return0;}

    The output of the above code is given below −

    Base class destructor called.
    

    Example: Virtual Destructor

    In this example, we have used a virtual destructor on base class Base. In the output, it can be observed that the destructor of both base and derived class is called and it maintains the reverse order of deletion.

    #include <iostream>usingnamespace std;classBase{public:// Virtual destructorvirtual~Base(){
    		cout <<"Base class destructor called.\n";}};classDerived:public Base{public:~Derived(){
    		cout <<"Derived class destructor also called.\n";}};intmain(){
    	Base* ptr =newDerived();// Both Base class and derived class destructor will be calleddelete ptr;return0;}

    The output of the above code is given below −

    Derived class destructor also called.
    Base class destructor called.
    

    When to Use Virtual Destructors?

    You can use a virtual destructor in the following scenarios.

    • If a virtual function is used, then use virtual destructor. Since, virtual functions are used in polymorphism to override base class. Using a virtual destructor can free up memory of both, base and derived class.
    • In inheritance, make the destructor of base class a virtual destructor as the destructor of derived class is skipped and only the base class destructor is called, it may cause a memory leak.
    • If abstract base or pure virtual function is used, then use virtual destructor on base class.

    Virtual Destructor Table (Vtable)

    In C++, virtual table(vtable) is a lookup table which is used by the compiler to implement virtual functions or virtual destructors. For each class that has at least one virtual function or virtual destructor, the compiler will create a vtable for that class.

    vtable has pointers to all virtual functions and the virtual destructor of a class. In a class, each object has a hidden pointer known as vptr or virtual pointer. This vptr points to the vtable of the class, which is then used to call the respective destructor. Here is a diagram representation of the vtable for the given code −

    Virtual Destructor Table

    Example

    In this example, we have implemented the above code snippet to override the virtual functions of class A in class B and class C.

    #include <iostream>usingnamespace std;classA{public:virtualvoidf1(){
    		cout <<"A::f1 called"<< endl;}virtualvoidf2(){
    		cout <<"A::f2 called"<< endl;}virtual~A(){
    		cout <<"Class A destructor called"<< endl;}};classB:public A{public:voidf1()override{
    		cout <<"B::f1 called"<< endl;}voidf2()override{
    		cout <<"B::f2 called"<< endl;}~B()override{
    		cout <<"Class B destructor called"<< endl;}};classC:public A{public:voidf1()override{
    		cout <<"C::f1 called"<< endl;}voidf2()override{
    		cout <<"C::f2 called"<< endl;}~C()override{
    		cout <<"Class C destructor called"<< endl;}};intmain(){
    	A* ptrB =newB();
    	A* ptrC =newC();
    
    	cout <<"Calling functions using pointer B:"<< endl;
    	ptrB->f1();
    	ptrB->f2();
    
    	cout <<"Calling functions using pointer C:"<< endl;
    	ptrC->f1();
    	ptrC->f2();// Calling B's destructor then A's destructordelete ptrB;// Calling C's destructor then A's destructordelete ptrC;return0;}

    The output of the above code is given below −

    Calling functions using pointer B:
    B::f1 called
    B::f2 called
    Calling functions using pointer C:
    C::f1 called
    C::f2 called
    Class B destructor called
    Class A destructor called
    Class C destructor called
    Class A destructor called
    

    Conclusion

    The virtual destructor is used when working with inheritance and polymorphism. Its main purpose is to make sure that the destructors of derived classes are also called when an object is deleted through a base class pointer. This prevents memory leaks and undefined behavior.

  • Destructors in C++

    destructor is a special member function of a class that is executed automatically whenever an object of its class goes out of scope or whenever the delete expression is applied to a pointer to the object of that class.

    Note: In C++, the static keyword has a different meaning. In this chapter, we’re using static memory allocation for stack-based / non-dynamic memory allocation.

    The syntax of defining a destructor manually is given below −

    ~class_name(){// body }

    Here’s the syntax to define a destructor outside the class, but first we need to declare the destructor in the class −

    class_name {public:// Destructor Declaration~class_name();}// Defining Destructorclass_name::~class_name(){// Body}

    Defining a Destructor Inside a Class

    In this example, we have used the above syntax for defining a destructor manually inside a class. Here, destructor is not needed, we have used destructor just to illustrate how a destructor is defined inside a class −

    #include <iostream>usingnamespace std;classExample{public:// Constructor calledExample(void){
             cout <<"Constructor is called"<< endl;}// Defining destructor inside class~Example(void){
             cout <<"Destructor is called"<< endl;}};intmain(){
       Example ex;return0;}

    The output of the above code is given below −

    Constructor is called
    Destructor is called
    

    Defining a Destructor Outside a Class

    The example below demonstrates how to define a destructor(Example) outside the class using scope resolution operator. But first, it needs to be declared inside the class.

    #include <iostream>usingnamespace std;classExample{public:// Constructor calledExample(void){
             cout <<"Constructor is called"<< endl;}// Declaring destructor inside class~Example();};// Defining destructor outside class using scope resolution operatorExample::~Example(void){
       cout <<"Destructor is called"<< endl;}intmain(){
       Example ex;return0;}

    The output of the above code is given below −

    Constructor is called
    Destructor is called
    

    Why Do We Need Custom Destructors?

    C++ provides a default destructor for every class as the classes are created. The default destructor cleans up the statically allocated memory. But, if we have used a pointer for dynamic memory allocation using new, then we need to define a custom destructor with delete operator to clean up the memory.

    In this example, the destructor Example1 is just used for displaying the message and not to free the memory as the memory of class Example1 gets freed automatically. But the destructor Example2 is used for freeing the memory using delete operator.

    #include <iostream>usingnamespace std;classExample1{public:// Constructor calledExample1(){
             cout <<"Constructor of Example1 is called"<< endl;}// Destructor called~Example1(){
             cout <<"Destructor of Example1 is called"<< endl;}};classExample2{private:int*ptr;public:Example2(){
             ptr =newint;// dynamically allocated memory*ptr =42;
             cout <<"Constructor of Example2 is called with ptr Value = "<<*ptr << endl;}// Destructor called to free dynamically allocated memory~Example2(){delete ptr;// dynamically allocated memory is freed
             cout <<"Destructor of Example2 is called"<< endl;}};intmain(){
       Example1 ex1;// object with static memory allocation
       Example2 ex2;// object with dynamic memory allocationreturn0;}

    The output of the above code is given below −

    Constructor of Example1 is called
    Constructor of Example2 is called with ptr Value = 42
    Destructor of Example2 is called
    Destructor of Example1 is called
    

    Properties of Destructors in C++

    Destructors in C++ have the following properties −

    • Destructors are automatically called when an object goes out of scope.
    • Destructor has the same name as the class and is denoted using tilde(~) sign.
    • It is automatically created when a class is created.
    • Destructors do not have any return type and do not accept any parameters/arguments.
    • You can not define more than one destructor.
    • Destructors cannot be inherited.
    • Destructors cannot be overloaded.

    Automatic Destructor Call for Statically Allocated Objects

    For objects that are created using static memory allocation, destructors are automatically called. Below is an example −

    #include <iostream>usingnamespace std;classMyClass{public:MyClass(){
             cout <<"Constructor called"<< endl;}~MyClass(){
             cout <<"Destructor called automatically"<< endl;}};intmain(){
       cout <<"Creating an object using static memory allocation"<< endl;{
          MyClass obj;
          cout <<"Object created"<< endl;}// Object goes out of scope here,//destructor called automatically
       cout <<"Object destroyed"<< endl;return0;}

    The output of the above code is given below −

    Creating an object using static memory allocation
    Constructor called
    Object created
    Destructor called automatically
    Object destroyed
    

    C++ Destructor for Dynamic Objects

    For objects that are created using dynamic memory allocation, you need to manually call the destructor using delete. In the example below, we have manually deleted the object using the delete operator:

    #include <iostream>usingnamespace std;classMyClass{public:MyClass(){
              cout <<"Constructor called"<< endl;}~MyClass(){
             cout <<"Destructor called"<< endl;}};intmain(){
       cout <<"Creating an object using dynamic memory allocation:"<< endl;// Dynamically creating an object
       MyClass *obj =newMyClass();
    
       cout <<"Object created"<< endl;// Manually invoking destructordelete obj;
       cout <<"Object destroyed manually using delete"<< endl;return0;}

    The output of the above code is given below −

    Creating an object using dynamic memory allocation:
    Constructor called
    Object created
    Destructor called
    Object destroyed manually using delete
    

    Destructor Call Order for Multiple Objects

    Destructors are called in reverse order of construction for multiple objects. In the example below, we can see that the destructors are called in the reverse order −

    #include <iostream>usingnamespace std;classMyClass{private:int id;public:MyClass(int num):id(num){
             cout <<"Constructor called for object "<< id << endl;}~MyClass(){
              cout <<"Destructor called for object "<< id << endl;}};intmain(){
    	cout <<"Creating 3 objects:"<< endl;{
    		MyClass obj1(1);// First object
    		MyClass obj2(2);// Second object
    		MyClass obj3(3);// Third object
    		cout <<"All objects created"<< endl;}// All objects go out of scope here
    
    	cout <<"All objects destroyed"<< endl;return0;}

    The output of the above code is given below −

    Creating 3 objects:
    Constructor called for object 1
    Constructor called for object 2
    Constructor called for object 3
    All objects created
    Destructor called for object 3
    Destructor called for object 2
    Destructor called for object 1
    All objects destroyed
    

    Destructors with Arrays

    To clean the memory after an array gets deleted or gets out of scope, we need to call destructor for each array item to avoid any memory leak. There can be three different types of scenarios while using a destructor with an array.

    • Using Destructor with Static Array
    • Using Destructor with a Dynamic Array
    • Using Destructor with an Array of Pointers to Objects

    Using a Destructor with a Static Array

    In this example, we have a static array of objects, and the memory is freed automatically by the compiler. Here, the destructor is used just for displaying the message.

    #include <iostream>usingnamespace std;classExample{private:int id;public:Example(int i):id(i){
             cout <<"Constructor called for object "<< id << endl;}~Example(){
             cout <<"Destructor called for object "<< id << endl;}};intmain(){
       cout <<"Creating array of 3 objects:"<< endl;
       Example arr[3]={Example(1),Example(2),Example(3)};
    
       cout <<"Array created"<< endl;return0;// Destructors called automatically}

    The output of the above code is given below −

    Creating array of 3 objects:
    Constructor called for object 1
    Constructor called for object 2
    Constructor called for object 3
    Array created
    Destructor called for object 3
    Destructor called for object 2
    Destructor called for object 1
    

    Using a Destructor with a Dynamic Array

    In this example, a dynamic array of objects is created using new[] operator. Here, the destructor is used with delete[] operator to clear the memory.

    #include <iostream>usingnamespace std;classStudent{private:int rollNo;public:Student(int r =0)// constructor with default argument{
             rollNo = r;
             cout <<"Constructor called for roll no: "<< rollNo << endl;}~Student(){
             cout <<"Destructor called for roll no: "<< rollNo << endl;}};intmain(){
       cout <<"Creating dynamic array of 3 students:"<< endl;
    
       Student *students =new Student[3]{101,102,103};// initialize with roll numbers
    
       cout <<"\nDeleting array:"<< endl;delete[] students;// destructor for all 3 objectsreturn0;}

    The output of the above code is given below −

    Creating dynamic array of 3 students:
    Constructor called for roll no: 101
    Constructor called for roll no: 102
    Constructor called for roll no: 103
    
    Deleting array:
    Destructor called for roll no: 103
    Destructor called for roll no: 102
    Destructor called for roll no: 101
    

    Using a Destructor with an Array of Pointers to Objects

    In this example, an array of pointers to objects is created. Here, the destructor is used with the delete operator to free the memory of each object individually as each pointer is pointing to a uniquely allocated object.

    #include <iostream>usingnamespace std;classBook{private:
          string title;public:Book(string t):title(t){
             cout <<"Book created: "<< title << endl;}~Book(){
            cout <<"Book destroyed: "<< title << endl;}};intmain(){
       cout <<"Creating array of 3 books:"<< endl;
        Book *library[3];// Creating individual book objects
       library[0]=newBook("C++ Basics");
       library[1]=newBook("CSS Basics");
       library[2]=newBook("Javascript Basics");
    
       cout <<"\nDeleting books:"<< endl;// Deleting each object individuallyfor(int i =0; i <3; i++){delete library[i];}return0;}

    The output of the above code is given below −

    Creating array of 3 books:
    Book created: C++ Basics
    Book created: CSS Basics
    Book created: Javascript Basics
    
    Deleting books:
    Book destroyed: C++ Basics
    Book destroyed: CSS Basics
    Book destroyed: Javascript Basics
    

    Common Mistakes While Working with Destructors

    Some of the common beginner mistakes while working with destructors are listed below −

    • Using destructor for statically allocated memory. It gets deleted automatically, so there is no need to use a destructor.
    • For dynamically allocated memory, forgetting to use the delete.
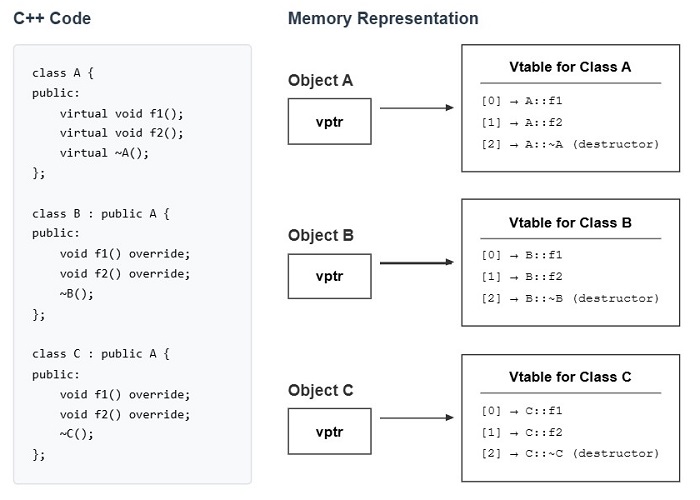
    • In inheritance, not declaring the destructor as virtual in the base class.
    • For arrays, use delete[] instead of delete.
    • Trying to delete an already-deleted memory twice, also known as double deletion. Set the pointer to nullptr after deleting it, and check the pointer for nullptr before deletion.

    Conclusion

    Destructors are special member functions to clean up memory when objects go out of scope or program is executed. In C++, there is a default destructor for statically allocated memory, and custom destructors are used for clearing the dynamically allocated memory using the new operator.

  • Dynamic Initialization Using Constructors in C++

    Dynamic Initialization Using Constructors

    In C++, Dynamic initialization is the process of initializing variables or objects at runtime using constructors.

    Where constructors play an important role in object creation and can be used to initialize both static and dynamic data members of a class.

    While creating an object, its constructor is called and if the constructor contains logic to initialize the data members with values, is known as dynamic initialization. This is helpful because here the value is calculated, retrieved, or determined during runtime, which is more flexible than static initialization.

    Syntax

    Here is the following syntax for dynamic initialization using constructors.

    ClassName* objectName =newClassName(constructor_arguments);

    Here, ClassName is the class type.

    objectName is the pointer to the object.

    constructor_arguments are the arguments passed to the constructor.

    Example of Dynamic Initialization Using Constructors

    Here is the following example of dynamic initialization using constructors.

    #include <iostream>usingnamespace std;classRectangle{public:int width, height;// Constructor to initialize width and heightRectangle(int w,int h):width(w),height(h){}voiddisplay(){
          cout <<"Width: "<< width <<", Height: "<< height << endl;}};intmain(){// Dynamically creating a Rectangle object using the constructor
       Rectangle* rect =newRectangle(10,5);// Display the values
       rect->display();// Deallocate memorydelete rect;return0;}

    Output

    Width: 10, Height: 5
    

    Explanation

    • The new Rectangle(10, 5) dynamically created a Rectangle object having width 10 and height 5 using the constructor.
    • This rect->display() is displaying the rectangle’s dimensions.
    • The delete rect; deallocates the memory used by the Rectangle object.

    Why Use Constructors for Dynamic Initialization?

    • Allows initialization with values known only at runtime.
    • Simplifies object creation and initialization logic.
    • Combines initialization and validation in a single step.

    Using a constructor to initialize dynamically within C++ makes it so much easier to create an object where the values get determined only at runtime. Encapsulation of initialization logic within the constructor makes the code clean, efficient, and more maintainable; use it whenever object initialization depends upon runtime data.

  • C++ – Constructor Initialization List

    When instantiating objects, constructors often handle the initialization of member variables. For such members, an initialization list for constructors provides an abbreviated and efficient way of their initialization before the constructor’s body is executed. Apart from performance, sometimes it also compulsory because of const variables or members of a base class.

    What is a Constructor Initialization List?

    A constructor initialization list is a procedure to initialize member variables directly, hence, there is no default constructor that is copied and then assigned.

    Syntax

    The following syntax of initialization of constructor list is as follows−

    ClassName(type1 param1, type2 param2):member1(param1),member2(param2){// Constructor body}

    Here, member1 and member2 are initialized with param1 and param2 before the constructor body runs.

    Example of Constructor Initialization List

    Heres a simple example demonstrating how to use an initialization list.

    #include <iostream>#include <string>classStudent{public:Student(const std::string& name,int age):name(name),age(age){}voiddisplay()const{
          std::cout <<"Name: "<< name <<", Age: "<< age <<"\n";}private:
          std::string name;int age;};intmain(){
       Student s("Navya",20);
       s.display();return0;}

    Output

    Name: Navya, Age: 20
    

    Why Use Constructor Initialization Lists?

    • To avoid default initialization followed by reassignment, to save time and resources.
    • It mandatory for certain types of const variables, reference members, and base class members.
    • It keeps all initialization logic in one place, separate from the constructor body.

    Special Cases

    In the following, we will discuss few special cases for constructor initialization list −

    Const or Reference Members

    Const variables and reference members cannot be reassigned, so they must be initialized in an initialization list,

    classConfig{public:Config(const std::string& product,constint& model):product(product),model(model){}private:const std::string product;constint& model;};

    Base Class Initialization

    When a derived class inherits from a base class, you can use an initialization list to call the base class constructor,

    class Base { public: Base(int value) : baseValue(value) {} protected: int baseValue; }; class Derived : public Base { public: Derived(int value, int extra) : Base(value), extraValue(extra) {} private: int extraValue; };

  • C++ – Delegating Constructors

    C++ Delegating Constructors

    Delegating constructors is a feature that simplifies the way constructors in a class handle the initialization task. It makes it easier to maintain object initialization by reducing redundancy, and by allowing one constructor to call another in the same class.

    Use of Delegating Constructors

    In class design, multiple constructors are often used to handle different initialization scenarios. However, this can lead to repetitive code because each constructor may duplicate similar initialization logic.

    By using the delegating constructors, code redundancy can be avoided. A single “main” constructor can handle most initialization tasks, while other constructors delegate to it.

    This approach follows the DRY (Don’t Repeat Yourself) principle and makes the code easier to maintain.

    Syntax of Delegating Constructors

    The syntax for a delegating constructor involves calling another constructor in the initializer list.

    classExample{public:// Primary constructor	  Example(int value):data(value){}// Delegating constructorExample():Example(0){}private:int data;};

    Where,

    • The Example(int value) is the main constructor that does the real initialization.
    • Example() is a delegating constructor that calls Example(int value) with a default value of 0.

    Rules for Using Delegating Constructors

    The following rules are applied when using delegating constructors in C++11 and later:

    • A constructor can delegate to only one other constructor in C++11 and later.
    • Delegation must occur within the same class.
    • Circular delegation (like A() : A(x) and A(x) : A()) is prohibited and will result in a compile-time error.

    Example of Delegating Constructors

    Here is a basic simple program for delegating constructors:

    #include <string>#include <iostream>classStudent{public:// Primary constructorStudent(const std::string& name,int age,double grade):name(name),age(age),grade(grade){}// Delegating constructor with default gradeStudent(const std::string& name,int age):Student(name, age,0.0){}// Delegating constructor with default age and gradeStudent(const std::string& name):Student(name,18,0.0){}voiddisplay()const{
          std::cout <<"Name: "<< name 
          <<", Age: "<< age 
          <<", Grade: "<< grade <<"\n";}private:
          std::string name;int age;double grade;};intmain(){
       Student s1("Navya",20,90.5);
       Student s2("Divya",22);
       Student s3("Kavya");
    
       s1.display();
       s2.display();
       s3.display();return0;}

    Output

    Name: Navya, Age: 20, Grade: 90.5  
    Name: Divya, Age: 22, Grade: 0  
    Name: Kavya, Age: 18, Grade: 0
    

    Advantages of Delegating Constructors

    The following are the advantages of using delegating constructors:

    • Centralized Initialization − By consolidating initialization logic into a single constructor, your code becomes easier to read and maintain
    • Avoidance of Redundancy − Reusing constructor logic eliminates duplicated code.
    • Ease of Modification − Changes to initialization logic need to be made only in the primary constructor.
  • C++ – Constructor with Default Arguments

    A constructor is a special member function in a class, which is automatically called when an object is created. These are used to initialize the object with values or default settings.

    Whereas default arguments in C++ allow to specify default values for function or constructor parameters.

    Constructor with Default Arguments

    A constructor with default arguments is a constructor that allows for the creation of an object using optional parameters. Where the default values for the parameters are provided, so when the user doesn’t pass any values, the default value is used.

    Syntax

    Here is the syntax given for the constructor with default arguments:

    classClassName{public:ClassName(parameter_Type parameter_Name = default_Value,
                  parameter_Type2 parameter_Name2 = default_Value2);};
    • Here, the constructor has the same name as the class
    • Default values are provided for one or more parameters.
    • If no value is passed by the user, then this default value will be used.

    Example of Constructor with Default Arguments

    Here is the following example for constructor with default arguments:

    #include <iostream>usingnamespace std;// Function with a default argumentvoidprintMessage(string message ="Hello, Tutorialspoint Learner"){
       cout << message << endl;}intmain(){// Calling the function without an argumentprintMessage();// Prints the default message: "Hello, World!"// Calling the function with a custom argumentprintMessage("Hi, there!");// Prints the custom message: "Hi, there!"return0;}

    Output

    Hello, Tutorialspoint Learner
    Hi, there!
    

    Explanation

    • A function printMessage() is created, giving a parameter of the default value “Hello, Tutorialspoint Learner”.
    • Now in main(), printMessage() function is called without any argument, so the default argument “Hello, Tutorialspoint Learner” is used.
    • whereas in printMessage(“Hi, there!”), we explicitly passed the value “Hi, there!” so this will override the default argument.

    Constructor with Multiple Default Arguments

    A constructor with multiple default arguments gives the user access to specify default values for more than one parameter. This provides more flexibility and access to pass any combination of arguments.

    Example

    Here is the following example for constructor with multiple default arguments:

    #include <iostream>usingnamespace std;classBox{public:int length, width, height;// Constructor with multiple default argumentsBox(int l =5,int w =10,int h =2){// Default values for length,    width, and height
             length = l;
             width = w;
             height = h;}voiddisplay(){
             cout <<"Length: "<< length <<", Width: "<< width <<", Height: "<< height << endl;}};intmain(){// Creating objects with different numbers of arguments
       Box box1;             
       Box box2(15);  
       Box box3(15,20);     
       Box box4(15,20,25);// Displaying the objects' values
       box1.display();
       box2.display();
       box3.display();
       box4.display();return0;}

    Output

    Length: 5, Width: 10, Height: 2
    Length: 15, Width: 10, Height: 2
    Length: 15, Width: 20, Height: 2
    Length: 15, Width: 20, Height: 25
    

    Explanation

    • Firstly, the class box is defined with three public member variables: length and width, where the constructor Box(int l = 5, int w = 10, int h = 2) has default arguments for all three parameters.
    • In object Box box1; no argument is provided, so the default constructor is called with default values, resulting in “Length: 5, Width: 10, Height: 2”.
    • In Box box2(15); length is provided as 15, but width and height are not provided, So it uses the default values respectively.
    • In Box box3(15, 20); length and width are provided with values 15 and 20 respectively, so it will override the default values and result accordingly.

    Key Features of Constructors with Default Arguments

    While it is similar to regular functions, it provides more flexibility and convenience while creating objects.

    Here in the following, we will discuss its all key features.

    1. Default values for parameters and flexibility in object creation

    Here the constructor can have default values for one or more parameters, which can be used when no argument is provided by the caller and allows multiple ways to create an object.

    2. Avoiding multiple constructor overloads

    You might need to load the constructor for every combination of arguments, which will make the code bulkier, but with default arguments, the constructor can be written once and it will handle different cases automatically.

    3. Order of Default Arguments

    In the case of multiple default value parameters, you cannot skip default arguments in the middle once you start providing defaults from the right.

    Syntax

    Box(int l =1,int w);// Invalid: 'w' has no default, but 'l' does.

    4. Default Arguments Can Be Used with Const Members

    If your class has const members, then default arguments can be provided in the constructor to make initialization easier.

    Syntax

    classBox{public:constint length, width;Box(int l =5,int w =10):length(l),width(w){}};

    This constructor uses default arguments (length = 5 and width = 10) to initialize the const members.

  • C++ – Constructor Overloading

    Constructor Overloading

    In C++, constructor overloading is a concept in object-oriented programming (OOP), where the user can define multiple constructors with the same name in a class with each having a different parameter list.

    Syntax

    Here’s the syntax for constructor overloading in C++.

    classClassName{public:// Constructor with no parameters (default constructor)ClassName(){// Initialization code}// Constructor with one parameterClassName(type param1){// Initialization code using param1}// Constructor with two parametersClassName(type param1, type param2){// Initialization code using param1 and param2}// Constructor with more parameters if neededClassName(type param1, type param2, type param3){// Initialization code using param1, param2, and param3}};

    Example of Constructor Overloading

    In this example, we will see how Constructor overloading allows the “Rectangle class” to have multiple constructors, each with a different parameter list. when we create an object of the rectangle class, the compiler automatically chooses the constructor that perfectly fits based on the arguments passed, showing how constructor overloading provides flexibility.

    Here is the following example of constructor overloading in C++.

    #include <iostream>usingnamespace std;classRectangle{public:int length, width;// Default constructor (no parameters)Rectangle(){
             length =1;
             width =1;}// Constructor with one parameter (square)Rectangle(int side){
             length = side;
             width = side;}// Constructor with two parameters (rectangle)Rectangle(int l,int w){
             length = l;
             width = w;}// Method to display the area of the rectanglevoiddisplayArea(){
             cout <<"Area: "<< length * width << endl;}};intmain(){// Using different constructors
       Rectangle rect1;// Default constructor
       Rectangle rect2(5);// Constructor with one parameter
       Rectangle rect3(5,3);// Constructor with two parameters
    
       rect1.displayArea();
       rect2.displayArea();
       rect3.displayArea();return0;}

    Output

    Area: 1
    Area: 25
    Area: 15
    

    Explanation

    • Firstly, we defined a class rectangle, with two public member variables, length and width.
    • Then a default constructor Rectangle() with values length and width equal to 1, then Constructors with One Parameter Rectangle(int side) and Two Parameters Rectangle(int l, int w).
    • When no arguments passed Rectangle rect1; the default constructor is called initializing length and width to 1.
    • When one argument is passed, Rectangle rect2(5); the constructor with one parameter is called, initializing both length and width to 5.
    • when two arguments are passed Rectangle rect3(5, 3); the constructor with two parameters is called, initializing length to 5 and width to 3.

    Benefits of Constructor Overloading

    Constructor Overloading provides various benefits, making it an essential feature for creating flexible and efficient classes.

    1. Flexibility in Object Initialization

    It gives you multiple ways of initializing an object or Multiple Initialization Options.

    2. Cleaner and Readable Code with enhanced Code Maintainability

    By providing different ways of initializing an object, it reduces the need for multiple setter methods or complex initialization logic, avoids redundancy, and provides simpler object creation, which ultimately gives cleaner and more readable code and easier to modify.

    3. Encapsulation of Initialization Logic

    It also encapsulates the initialization logic within the constructor, which means the initialization logic is managed inside the constructor rather than being spread across various methods or outside the class.

    4. Simplifies Object Cloning (Copy Constructors)

    Constructor overloading allows to defined copy constructor to handle both shallow and deep copying objects, this makes sure that the object is easily copied.