Author: admin

  • Observer Design Pattern in C++

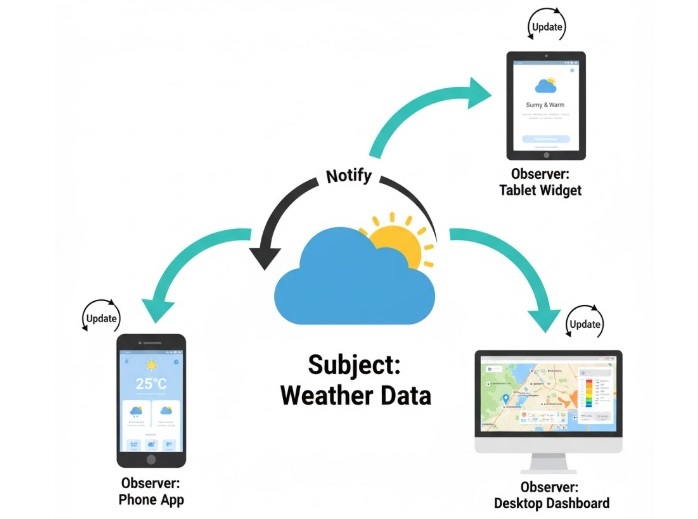
    Observer Design Pattern is a way to make sure that when something important changes in one part of your program, all the other parts that care about it get updated right away. It’s called a one-to-many relationship because one main object (the subject) can have many other objects (the observers) watching it. When the subject changes, it tells all its observers so they can update themselves. This is super helpful when you want different parts of your program to always show the latest information, but you don’t want them to be tightly connected or mixed together.

    For example, imagine you have a weather app with several display screens showing the current weather. The weather data is the subject, and the display screens are the observers. Whenever the weather changes, the weather data tells all the screens to update, so everyone always sees the newest weather. This way, you don’t have to update each screen by hand because they all get the news automatically.

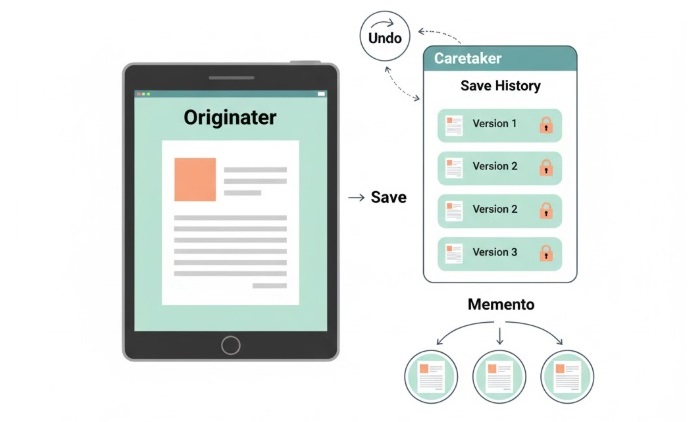
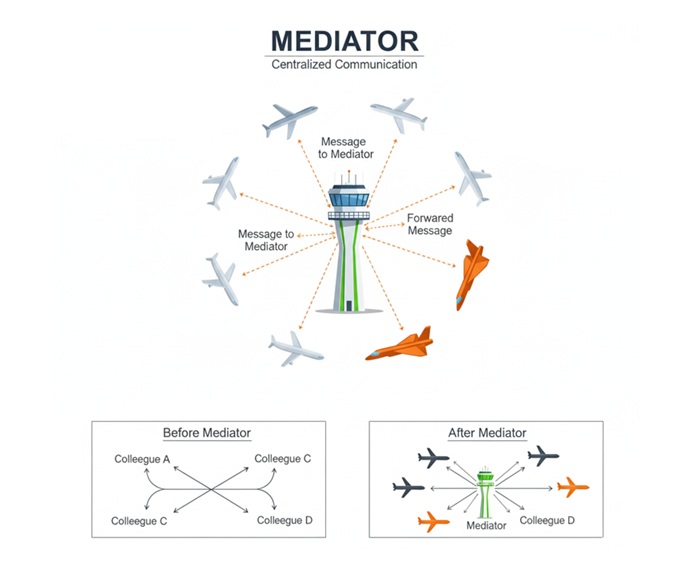
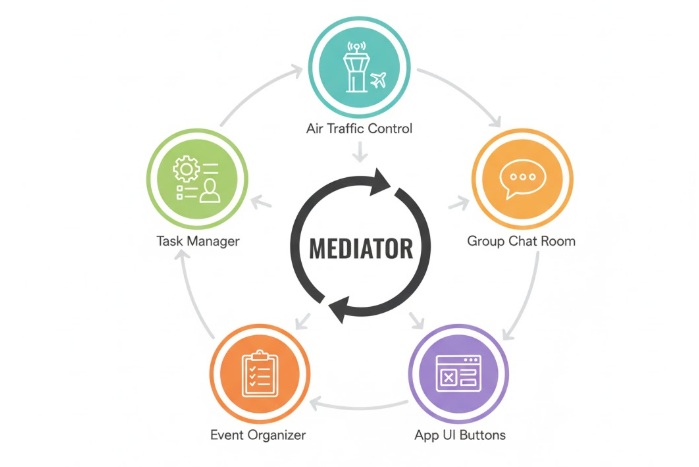
    Sometimes people mix up the Observer Design Pattern with the Mediator Design Pattern. The difference is important: in the Observer Pattern, the subject keeps a list of observers and tells them when something changes. In the Mediator Pattern, there’s a special mediator object in the middle that helps different objects talk to each other, so they don’t talk directly. The Observer Pattern is all about keeping things in sync, while the Mediator Pattern is about organizing communication.

    Observer Design Pattern Illustration

    Components of Observer Design Pattern

    The Observer Design Pattern consists of the following main components −

    • Subject − This is the main object that has some important information or state. When something changes inside the subject, it lets others know about it. The subject keeps a list of all the people (observers) who want to know when something changes. For example, in a weather app, the weather data is the subject because it knows the latest weather and tells others when it changes.
    • Observer − An observer is anyone who wants to know when the subject changes. Observers sign up with the subject, and whenever there is an update, the subject tells all its observers. In our weather app example, the display screens are observers because they show the latest weather whenever the weather data changes.
    • Concrete Subject − This is a real, working version of the subject. It actually stores the data and knows how to tell the observers when something changes. In the weather app, the WeatherData class is the concrete subject because it keeps the weather info and notifies the displays.
    • Concrete Observer − This is a real, working version of an observer. It knows how to react when the subject tells it about a change. In the weather app, the WeatherDisplay class is a concrete observer because it updates what it shows whenever the weather changes.

    C++ Implementation of Observer Design Pattern

    In this section, we will implement the Observer Design Pattern in C++. We will create a simple weather monitoring application to demonstrate how the pattern works.

    Steps to Implement Observer Design Pattern in C++

    Steps to Implement Observer Design Pattern

    Follow these steps to implement the Observer Design Pattern in C++:

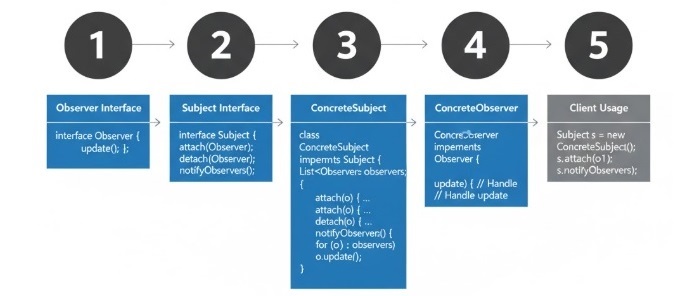
    • First, create an Observer interface. This is like a contract that says every observer must have an update function. This function will be called whenever there is a change.
    • Next, make a class for the actual observers (for example, a display screen). This class should use the Observer interface and define what happens when it gets updated (like showing the new weather).
    • Now, create a Subject interface. This is a contract for the main object (like the weather data) and says it must have ways to add, remove, and notify observers.
    • Then, make a class for the real subject (for example, the weather data). This class should use the Subject interface and keep a list of all observers. When the weather changes, it should tell all observers by calling their update function.
    • In your main program, make objects for the subject (weather data) and the observers (display screens).
    • Add the observers to the subject’s list, then change the weather data to see how all the observers get updated automatically.

    Example Code for Observer Design Pattern in C++

    Here is a simple implementation of the Observer Design Pattern in C++

    #include <algorithm>#include <iostream>#include <vector>usingnamespace std;// Observer interfaceclassObserver{public:virtualvoidupdate(float temperature,float humidity,float pressure)=0;};// Concrete Observer classclassWeatherDisplay:public Observer{private:float temperature;float humidity;float pressure;public:voidupdate(float temp,float hum,float pres)override{
          temperature = temp;
          humidity = hum;
          pressure = pres;display();}voiddisplay(){
          cout <<"Weather Update - Temperature: "<< temperature
               <<", Humidity: "<< humidity
               <<", Pressure: "<< pressure << endl;}};// Subject interfaceclassSubject{public:virtualvoidattach(Observer* observer)=0;virtualvoiddetach(Observer* observer)=0;virtualvoidnotify()=0;};// Concrete Subject classclassWeatherData:public Subject{private:
       vector<Observer*> observers;float temperature;float humidity;float pressure;public:voidattach(Observer* observer)override{
          observers.push_back(observer);}voiddetach(Observer* observer)override{
          observers.erase(remove(observers.begin(), observers.end(), observer), observers.end());}voidnotify()override{for(Observer* observer : observers){
             observer->update(temperature, humidity, pressure);}}voidsetMeasurements(float temp,float hum,float pres){
          temperature = temp;
          humidity = hum;
          pressure = pres;notify();}};intmain(){
       WeatherData weatherData;
    
       WeatherDisplay display1;
       WeatherDisplay display2;
    
       weatherData.attach(&display1);
       weatherData.attach(&display2);
    
       weatherData.setMeasurements(30.5,65,1013.1);
       weatherData.setMeasurements(28.3,70,1012.5);
    
       weatherData.detach(&display1);
    
       weatherData.setMeasurements(25.0,80,1011.8);return0;}

    Following is the output of the above code −

    Weather Update - Temperature: 30.5, Humidity: 65, Pressure: 1013.1
    Weather Update - Temperature: 30.5, Humidity: 65, Pressure: 1013.1
    Weather Update - Temperature: 28.3, Humidity: 70, Pressure: 1012.5
    Weather Update - Temperature: 25.0, Humidity: 80, Pressure: 1011.8
    

    Pros and Cons of Observer Design Pattern

    The Observer Design Pattern offers several advantages and disadvantages −

    ProsCons
    The Observer Design Pattern makes it easy to add new observers without changing the existing code. This means your program can grow and change over time without breaking things that already work.If you forget to remove observers when they are no longer needed, your program might use more memory than necessary. This can cause memory leaks, especially if the subject is destroyed but the observers are still around.
    The subject and the observers do not need to know much about each other. This makes your code easier to change and maintain because you can update one part without affecting the other.If the subject changes its state very often, it will notify all observers each time. This can slow down your program if there are many observers or updates.
    You can add or remove observers while the program is running. This means your program can react to changes and new requirements without stopping or restarting.Managing the list of observers and making sure everyone gets the right updates can make your code more complicated, especially in big programs.
    You can use the same observer with different subjects. This helps you avoid writing the same code again and again.Observers are not always notified in a specific order. If your program depends on the order of updates, this can sometimes cause problems.

    When to use Observer Design Pattern

    The Observer Design Pattern is particularly useful in the following scenarios −

    • Use the Observer Design Pattern when you have one object that changes, and you want many other objects to know about this change automatically. For example, if you have a weather station and several display screens, you want all screens to show the new weather as soon as it changes.
    • This pattern is helpful when you don’t know in advance how many things need to be updated. You can add or remove observers (like display screens) at any time, and they will always get the latest information.
    • It’s also great when you want to keep your code simple and not have the main object (the subject) worry about who needs updates. The subject just sends out the update, and all observers get it automatically.
    • If you want to build a system where different parts react to changes or events, like in event-driven programs or notification systems, the Observer Design Pattern makes this easy and keeps everything organized.

    Real-World Examples of Observer Design Pattern

    Here are some real-world examples where the Observer Design Pattern is used −

    • GUI frameworks use this pattern so that when the data model changes, all the UI components (like buttonslabels, or charts) update automatically to show the latest information.
    • Event-driven systems let different parts of a program react to things that happen, like a button click or a new message. When the event source changes, all the listeners (observers) get notified and can respond right away.
    • On social media platforms, when someone you follow (the subject) posts something new, you (the observer) get an update instantly. This keeps you connected and always up to date with your favorite accounts.
    • Stock market apps use this pattern so that whenever a stock price changes, all the investors who are watching that stock get the latest price right away. This helps investors make quick decisions based on real-time data.
    • Messaging systems let you subscribe to topics or channels. When a publisher sends a new message, all the subscribers (observers) who are interested in that topic get the message automatically, so nobody misses important updates.
    Real-World Use Cases of Observer Design Pattern

    Conclusion

    In this chapter, you learned about the Observer Design Pattern, how it works, its good and bad sides, and where it is used in real life. This pattern is very helpful for making programs where changes in one part need to be shared with many other parts, that keeps everything up to date and easy to manage.

  • Memento Design Pattern in C++

    Memento Design Pattern is a behavioral design pattern that allows an object to capture its internal state and save it externally so that it can be restored later without violating encapsulation. This pattern is particularly useful when you want to implement features like undo/redo functionality in applications.

    For example, take an application where users can edit documents. By using the Memento Design Pattern, the application can save the state of the document at various points in time. If the user wants to undo their last action, the application can restore the document to its previous state using the saved memento. This way, the internal state of the document is preserved without exposing its details to other parts of the application.

    Memento Design Pattern Illustration

    Components of Memento Design Pattern

    The Memento Design Pattern consists of three main components −

    • Originator − The main object you want to save and restore. It can make a memento (a snapshot of its current state) and later use that memento to go back to how it was before. For example, in a text editor, the Originator is the editor itself that holds your text.
    • Memento − A special object that remembers the state of the Originator at a certain time. Once made, its contents cannot be changed, so you can always trust it to bring things back exactly as they were. Think of it like a bookmark or a save point.
    • Caretaker − The helper that keeps track of all the mementos (saved states). It stores them safely and can ask the Originator to go back to a previous state when needed. The Caretaker never looks inside the mementos or changes them; it just holds onto them and gives them back when you want to undo or redo something.

    C++ Implementation of Memento Design Pattern

    We will use all three components of the Memento Design Pattern to implement a simple text editor that allows users to type text and undo their last action.

    In this editor, the Originator will be the TextEditor class, which maintains the current text and creates mementos to save its state. The Memento will be the TextMemento class, which stores the text state. The Caretaker will be the EditorHistory class, which manages the mementos and allows undo functionality.

    Steps to Implement Memento Design Pattern in C++

    Follow these steps to implement the Memento Design Pattern in C++

    Steps to Implement Memento Design Pattern
    • Create a Memento class ( TextMemento ) that will save the from the editor. This class just keeps a copy of the text so you can get it back later.
    • Make an Originator class ( TextEditor ). This is your main editor where you type and change text. It can create a memento to save its current text, and it can restore its text from a memento if you want to go back.
    • Add a Caretaker class ( EditorHistory ). This class remembers all the saved versions (mementos) of your text. It lets you undo by giving you back the last saved version.
    • Write a main function to show how it works. Here, you will type some text, save it, and then use undo to go back to earlier versions.

    C++ Code of Memento Design Pattern

    Below is the C++ code that implements the Memento Design Pattern for a simple text editor with undo functionality −

    #include <iostream>#include <string>#include <vector>usingnamespace std;// Memento classclassTextMemento{private:
       string textState;public:TextMemento(const string &state):textState(state){}
       string getState()const{return textState;}};// Originator classclassTextEditor{private:
       string text;public:voidtype(const string &newText){
           text += newText;}
       string getText()const{return text;}
       TextMemento save(){returnTextMemento(text);}voidrestore(const TextMemento &memento){
           text = memento.getState();}};// Caretaker classclassEditorHistory{private:
       vector<TextMemento> history;public:voidpush(const TextMemento &memento){
          history.push_back(memento);}
       TextMemento pop(){if(!history.empty()){
             TextMemento memento = history.back();
             history.pop_back();return memento;}returnTextMemento("");}};// Main function to demonstrate Memento Design Patternintmain(){
       TextEditor editor;
       EditorHistory history;
    
       editor.type("Hello, ");
       history.push(editor.save());
       editor.type("World!");
       history.push(editor.save());
    
       cout <<"Current Text: "<< editor.getText()<< endl;
    
       editor.restore(history.pop());
       cout <<"After Undo: "<< editor.getText()<< endl;
    
       editor.restore(history.pop());
       cout <<"After Undo: "<< editor.getText()<< endl;return0;}

    In this code, we have defined the TextMemento class to store the text state, the TextEditor class to manage the text and create/restore mementos, and the EditorHistory class to manage the history of mementos for undo functionality. The main function demonstrates how to use these classes to type text and undo actions.

    Current Text: Hello, World!
    After Undo: Hello, 
    After Undo: 
    

    Pros and Cons of Memento Design Pattern

    Following are the advantages and disadvantages of using the Memento Design Pattern −

    ProsCons
    Undo is easy and helpful. You can quickly go back to an earlier version if you make a mistake or want to change something.It can use a lot of memory if you keep saving many versions. This might make your program slower or take up more space.
    Your object’s details stay safe. Other parts of your program cannot change or see the inside details by mistake, so your data is protected.You need to make extra classes to use this pattern. This can make your code a little more complicated and harder to manage.
    Undo and redo features are simple to add. This pattern makes it easy for users to fix mistakes or try different things without worry.Saving big or many states can slow things down. If your program saves a lot of information often, it might not run as fast.

    When to Use Memento Design Pattern

    The Memento Design Pattern is very useful in everyday programs where you want to let people fix mistakes or go back to something they did before. It is especially helpful for adding undo and redo features, which make programs much easier and safer to use.

    For example, if someone is writing in a text editor or drawing in a paint app, they might make a mistake. With this pattern, the program can save the state of their work at different times. If they want to fix a mistake, they can restore an earlier version without anyone seeing or changing the private details inside the program.

    This pattern is also great for keeping a history of changes. People can easily go back to an earlier version of their work if they change their mind or want to try something different. It helps make programs more friendly and less stressful to use.

    Real-World Examples of Memento Design Pattern

    Here are some real-world examples where the Memento Design Pattern is used in simple, everyday language −

    Real-World Use Cases of Memento Design Pattern
    • Text editors like Notepad or Word let you undo and redo what you type. If you make a mistake, you can easily go back to how it was before.
    • Drawing or graphic design apps let you revert to an earlier version of your picture. If you don’t like your last change, you can bring back the old version.
    • Video games often let you save your progress. If you lose or want to try again, you can load your saved game and start from there.
    • Version control systems (like Git) help you track changes to your files. If you want to go back to an older version, you can restore it easily.
    • Databases use this pattern to roll back to a safe state if something goes wrong, so your data stays safe.
    • Settings or configuration managers let you save your system settings. If you change something and it doesn’t work, you can restore the old settings.

    Conclusion

    In this chapter, you learned about the Memento Design Pattern, its three main parts, and how to use it in C++. You also saw the good and bad sides, when to use it, and some real-life examples. The Memento Pattern is a great way to let users undo and redo actions, keep their data safe, and make your programs easier to use.

  • Mediator Design Pattern in C++

    Mediator Design Pattern is a way to make communication between different objects or classes much simpler. Instead of having every object talk directly to every other object, which can get very confusing, we use a special class called the mediator. The mediator acts like a middleman and handles all the messages between objects. This makes the code easier to manage and change later because the objects don’t need to know about each other.

    Let’s make this even clearer with a simple example from real life. Imagine an airport. There are many airplanes, and they all need to communicate about when to take off or land. If every airplane tried to talk to every other airplane, it would be chaos! Instead, there is a control tower. The control tower is the mediator. All airplanes talk only to the control tower, and the tower tells each airplane what to do. This keeps everything organized and safe.

    So, in programming, the mediator pattern works just like the control tower at the airport. It helps different parts of a program communicate in an organized way, making the whole system easier to understand and maintain.

    Mediator Design Pattern Illustration

    Components of Mediator Design Pattern

    Following are the main components of the Mediator Design Pattern −

    • Mediator − Think of this as the main organizer or the middleman. It’s a special class that helps different parts of the program talk to each other. Instead of everyone talking to everyone, they all talk to the mediator.
    • ConcreteMediator − This is the real middleman in action. It knows about all the different parts (objects) and helps them send messages to each other. If one part wants to talk to another, it tells the mediator, and the mediator passes the message along.
    • Colleague − These are the different parts or objects in your program that need to communicate. Each one knows about the mediator, but they don’t know about each other. If they want to send a message, they go through the mediator.
    • ConcreteColleague − These are the actual objects doing the work in your program. They use the mediator to talk to other objects. For example, in a chat room, each user is a ConcreteColleague, and they send messages through the chat room (the mediator).

    C++ Implementation of Mediator Design Pattern

    In this section, we will implement a simple mediator pattern example where we have a chat room that acts as a mediator between different users.

    Steps to Implement Mediator Design Pattern in C++

    Step 1: Create the Mediator Interface − This is like making a set of rules for how the middleman (mediator) will help others talk to each other. It just says what the mediator should be able to do, but not how.

    Step 2: Make the Real Mediator Class − Here, you actually build the middleman. This class knows about everyone who needs to talk and helps them send messages to each other.

    Step 3: Create the Colleague Interface − This is a simple plan for all the people (objects) who want to talk to each other. It says what each one should be able to do, like send a message.

    Step 4: Build the Real Colleague Classes − Now you make the actual people (objects) who will use the mediator to talk. Each one uses the middleman instead of talking directly to others.

    Step 5: See How It Works Together − Put everything together and show how the objects use the mediator to send messages. This is where you see the pattern in action, just like people using a group chat to talk instead of calling each other one by one.

    C++ Code Example of Mediator Design Pattern

    Following is a simple C++ code example demonstrating the Mediator Design Pattern −

    #include <iostream>#include <string>#include <vector>usingnamespace std;// Mediator InterfaceclassChatMediator{public:virtualvoidshowMessage(const string &user,const string &message)=0;};// Concrete MediatorclassChatRoom:public ChatMediator{private:
       vector<string> users;public:voidaddUser(const string &user){
          users.push_back(user);}voidshowMessage(const string &user,const string &message)override{
          cout << user <<": "<< message << endl;}};// Colleague InterfaceclassUser{protected:
       ChatMediator *mediator;
       string name;public:User(ChatMediator *med,const string &n):mediator(med),name(n){}virtualvoidsendMessage(const string &message)=0;};// Concrete ColleagueclassChatUser:public User{public:ChatUser(ChatMediator *med,const string &n):User(med, n){}voidsendMessage(const string &message)override{
          mediator->showMessage(name, message);}};intmain(){
       ChatRoom chatRoom;
    
       ChatUser user1(&chatRoom,"Alice");
       ChatUser user2(&chatRoom,"Bob");
       ChatUser user3(&chatRoom,"Charlie");
       chatRoom.addUser("Alice");
       chatRoom.addUser("Bob");
       chatRoom.addUser("Charlie");
       user1.sendMessage("Hello, everyone!");
       user2.sendMessage("Hi Alice!");
       user3.sendMessage("Hey folks, what's up?");return0;}

    Following is the output of the above code −

    Alice: Hello, everyone!
    Bob: Hi Alice!
    Charlie: Hey folks, what's up?
    

    In this example, we have a ChatMediator interface, which is just a set of rules for how messages should be shown. The ChatRoom class follows these rules and acts as the main helper, or “middleman,” for all the users. The User class is like a basic plan for anyone who wants to join the chat, and the ChatUser class is a real person in the chat who sends messages using the chat room.

    Here’s how it works: When a user wants to send a message, they don’t talk directly to other users. Instead, they tell the chat room (the mediator), and the chat room takes care of showing the message. This keeps things simple and organized, because users don’t need to know about each other-they just use the chat room to communicate.

    When you run the code above, you’ll see that all the users send their messages through the chat room. This is a clear example of how the Mediator Design Pattern helps different parts of a program talk to each other in a simple and tidy way, without getting mixed up or confused.

    Pros and Cons of Mediator Design Pattern

    Like any design pattern, the Mediator Design Pattern has its good sides and its not-so-good sides.

    ProsCons
    Makes it easier for different parts of your program to work together without being directly connected. This means if you change one part, you don’t have to change all the others.If too many things depend on the mediator, it can become overloaded and slow things down.
    Puts all the rules for how things talk to each other in one place, so it’s simpler to see and fix how communication works.Adds an extra step (the mediator) between objects, which can make the program a bit more complicated.
    Helps different parts of your program talk to each other, even if they don’t know about each other at all.If you’re not careful, the mediator can become too big and hard to manage.
    Makes your code easier to read and understand because everything goes through the mediator.Because messages go through the mediator, it can be harder to figure out where a problem is if something goes wrong.
    If you want to change how things communicate, you only need to update the mediator, not every single part.Sometimes, using a mediator too much can make the other parts less independent and flexible.

    When to Use Mediator Design Pattern

    The Mediator Design Pattern is particularly useful in the following scenarios −

    • If your program has many different parts that all need to talk to each other, things can quickly get confusing. For example, imagine you have lots of buttonswindows, or users, and they all need to send messages or updates to each other. The Mediator pattern helps keep everything organized by letting each part talk only to a central helper, instead of directly to every other part.
    • It’s much easier to change your code later if each part only talks to the mediator (the middleman). If you ever want to change how things communicate, you just update the mediator, and you don’t have to rewrite everything else. This saves time and makes your program easier to maintain.
    • eeping all the rules for how things talk to each other in one place makes your program simpler to understand and fix. Instead of searching through lots of different files or classes to figure out how communication works, you just look at the mediator.
    • Different parts of your program don’t need to know about each other at all. This means you can addremove, or change parts without worrying about breaking the rest of your program.
    • Your code becomes much easier to read and understand. By using a mediator, you avoid a tangled mess of connections, and it’s clear how everything communicates. This makes it easier for you or anyone else to work with your code in the future.

    Real-World Examples of Mediator Design Pattern

    Some real-world examples of the Mediator Design Pattern include −

    • When you look at how airplanes work at an airport, you can see the mediator pattern in action. All the airplanes do not talk to each other directly. Instead, they all talk to the control tower. The control tower tells each airplane when it is safe to land or take off. This keeps everything safe and organized. The control tower is like a helpful friend who makes sure everyone knows what to do.
    • In a group chat, people do not send messages straight to each other. Everyone sends their message to the chat room. The chat room then shares the message with everyone else. This means people do not need to know who is in the chat or how to reach them. The chat room helps everyone stay connected easily.
    • When you use an app with buttons and windows, the buttons do not talk to each other or to the windows directly. There is a central part of the program that listens to all the buttons and windows. This central part decides what should happen when you click a button or open a window. It helps everything work together smoothly, just like a helpful guide.
    • If you think about a big event like a wedding, the guests do not talk to every vendor, such as the caterer, photographer, or band, by themselves. There is an event organizer who talks to everyone and makes sure things happen at the right time. The event organizer helps everyone work together and keeps things running smoothly.
    • In some offices, there is a manager who gives out tasks to different workers and makes sure everyone knows what to do. The workers do not have to talk to each other about who does what. The manager handles all the communication and helps everyone stay on track.
    Real World Use Cases of Mediator Design Pattern

    Conclusion

    In this chapter, we have learned about the Mediator Design Pattern, its components, implementation in C++, pros and cons, and real-world examples. The Mediator Design Pattern is a powerful tool for managing complex communication between objects while promoting loose coupling and maintainability. By using this pattern, developers can create more flexible and scalable systems that are easier to understand and maintain.

  • Iterator Design Pattern in C++

    Iterator Design Pattern is a behavioral design pattern that helps you move through a collection of items-like a liststack, or tree-without needing to know how that collection is built on the inside. Imagine you have a box full of different objects, and you want to look at each one, one by one, without having to open the box and figure out how everything is arranged. The Iterator pattern gives you a simple way to do this, making it easier to work with all kinds of collections in a consistent way.

    This pattern is especially useful when your application uses many different types of collections. Instead of writing separate code to loop through each type, you can use the Iterator pattern to create a common approach for all of them. This not only saves time but also makes your code cleaner and easier to update in the future. If you ever change how a collection is stored, you won’t have to rewrite the code that goes through its elements.

    Iterator Design Pattern Illustration

    For example, think about a music playlist app. You might have playlists stored as arrayslinked lists, or even trees. With the Iterator pattern, you can play songs from any playlist in the same way, without worrying about how the playlist is organized behind the scenes. This makes your program more flexible and much easier to maintain.

    Key Components of the Iterator Pattern

    • Iterator − Think of this as a guide that helps you move through a collection, one item at a time. The Iterator lays out the basic steps you need, like checking if there are more items to see (hasNext()) and getting the next item in line (next()). It doesn’t care what’s inside the collection or how it’s organized—it just gives you a simple way to look at each item, one after another.
    • Concrete Iterator − This is the actual helper that knows how to walk through a specific collection, like a list of books or a playlist of songs. It remembers where you are in the collection and knows how to get to the next item. For example, if you’re flipping through a stack of cards, the Concrete Iterator keeps track of which card you’re on and helps you move to the next one.
    • Aggregate − This is just a fancy word for any group or collection of items—like a bookshelf full of books or a playlist full of songs. The Aggregate sets the rule that says, “If you want to look through my items, you need to use an iterator.” It provides a way to get an iterator so you can start exploring the collection.
    • Concrete Aggregate − This is the actual collection itself, like your bookshelf or playlist. It holds all the items and knows how to give you an iterator that can walk through them. For example, your Library class might store a bunch of book titles and provide a way to get an iterator so you can read each title one by one.

    Implementation of Iterator Pattern in C++

    In this example, we will implement the Iterator Design Pattern in C++ to traverse a collection of books in a library.

    We will take example of a simple library system where we have a collection of books and we want to iterate through them using the Iterator pattern.

    Steps to Implement the Iterator Pattern in C++

    Following are the steps to implement the Iterator Design Pattern in C++

    Steps to Implement Iterator Design Pattern
    • Start by outlining what it means to move through a collection, and define an Iterator interface. This interface should include methods such as next() to get the next item, and hasNext() to check if there are more items left to visit.
    • Next, create a class that actually implements this Iterator interface for your specific collection. For example, if you have a list of books, this class will know how to go from one book to the next and keep track of where you are in the list.
    • Then, define an Aggregate interface. This is just a way to say that any collection (like a library of books) should be able to give you an iterator so you can look through its items.
    • After that, make a concrete class for your collection-like a Library class for books-that implements the Aggregate interface. This class will store your items and provide a way to create an iterator for them.
    • Finally, use the iterator in your main code to go through the collection. The beauty here is that you don’t need to know how the collection is organized inside; you just use the iterator to access each item one by one, making your code much simpler and easier to manage.

    C++ Code to Implement Iterator Pattern

    Following is the C++ code that demonstrates the Iterator Design Pattern −

    #include <iostream>#include <vector>usingnamespace std;// Iterator InterfaceclassIterator{public:virtualboolhasNext()=0;virtual string next()=0;};// Concrete IteratorclassBookIterator:public Iterator{private:
       vector<string> books;int position;public:BookIterator(vector<string> b):books(b),position(0){}boolhasNext()override{return position < books.size();}
       string next()override{return books[position++];}};// Aggregate InterfaceclassAggregate{public:virtual Iterator*createIterator()=0;};// Concrete AggregateclassLibrary:public Aggregate{private:
       vector<string> books;public:voidaddBook(string book){
          books.push_back(book);}
       Iterator*createIterator()override{returnnewBookIterator(books);}};// Client Codeintmain(){
       Library library;
       library.addBook("The Great Gatsby");
       library.addBook("1984");
       library.addBook("To Kill a Mockingbird");
    
       Iterator* iterator = library.createIterator();
    
       cout <<"Books in the Library:"<< endl;while(iterator->hasNext()){
          cout << iterator->next()<< endl;}delete iterator;return0;}

    Following is the output of the above code −

    Books in the Library:
    The Great Gatsby
    1984
    To Kill a Mockingbird
    

    In this example, we start by defining an Iterator interface, which lays out the basic methods needed to move through a collection: one to check if there are more items, and another to get the next item. The BookIterator class is a concrete implementation of this interface, specifically designed to work with a collection of book titles. It keeps track of its current position in the collection and knows how to move from one book to the next.

    The Library class acts as our collection of books. It provides a way to add new books and, importantly, a method to create an iterator that can be used to go through its books. This means that the details of how the books are stored—whether in a vector, list, or any other structure—are hidden from the code that uses the library.

    In the main part of the program, we create a Library object, add a few book titles to it, and then use the iterator to print out each book. Notice how the code that prints the books doesn’t need to know anything about how the books are stored inside the library. It simply asks the iterator if there are more books, and if so, gets the next one. This separation makes the code much easier to read, maintain, and extend in the future.

    Pros and Cons of Iterator Pattern

    ProsCons
    Makes it much easier to go through complex data structures, like trees or graphs, without having to understand their internal details.Sometimes, having many different iterator classes can make the codebase more complicated than necessary.
    Encourages code reuse by letting you use the same approach to loop through different types of collections.The extra layer of abstraction can slow things down a bit, especially if you only need to work with simple collections.
    Keeps the way collections are stored private, so you can change the internal structure later without affecting the rest of your code.For very simple collections, using an iterator might be overkill and less efficient than direct access.

    When to Use the Iterator Pattern

    The Iterator pattern is especially helpful in situations like these −

    • If you’re working with several different types of collections-like arrayslinked lists, or trees-and you want to loop through all of them using the same simple approach, the Iterator pattern is a great fit. It saves you from having to write separate, complicated code for each collection type.
    • When you want to keep the inner workings of your collections private, so that the rest of your program doesn’t need to know or care about how the data is actually stored. This means you can change the way your collection is built later, without breaking any code that uses it.
    • If you need to offer multiple ways to go through your collection-like moving forwardbackward, or skipping certain items-the Iterator pattern lets you create different iterators for each scenario, making your code more flexible and user-friendly.
    • When your collections are complicated, such as trees or graphs, and you want to make it as easy as possible for someone else (or even yourself in the future) to use them. The Iterator pattern hides the complexity and lets you focus on what you want to do with each item, not how to get to it.

    Real-World Examples of Iterator Pattern

    Following are some real-world examples where the Iterator Design Pattern is commonly used −

    Real-World Use Cases of Iterator Design Pattern
    • In Java, the java.util.Iterator interface lets you loop through lists, sets, and other collections in a consistent way.
    • In Python, the iterator protocol (using __iter__() and __next__() methods) allows you to use loops with any object that supports iteration.
    • C++’s Standard Template Library (STL) uses iterators to let you move through containers like vectors, lists, and maps, making it easy to write generic code.
    • Database cursors work like iterators, letting you go through query results one row at a time without worrying about how the data is stored.
    • Java’s Stream API uses iterators behind the scenes to process sequences of data in a functional style.
    • Tools that let you browse files and folders on your computer often use iterators to move through directories and files.

    Conclusion

    The Iterator Design Pattern is a practical and widely used solution for working with collections of data. By separating the way you access items from the way they are stored, it makes your code more flexible, easier to maintain, and ready for future changes. Whether you’re building a playlist app, managing a library of books, or working with any kind of collection, the Iterator pattern helps you keep your code clean and adaptable.

  • Facade Design Pattern in C++

    Facade Design Pattern is a structural design pattern that provides a single and simplified interface to a complex system of classes, library or framework. It orginizes a complicated system by adding a simple interface to it.

    Instead of having multiple objects to interact with, the client can interact with a single facade object which internally manages the interactions with the complex system.

    Imagine the following big “Facade” building is like a magic “Play” button for a whole toy factory. You just press that one button, and inside, all the machines start working together automatically to make toys, without you needing to know how each one works.

    Facade Design Pattern Example

    Components of Facade Design Pattern

    The Facade Design Pattern consists of the following three parts −

    • Facade − This is the main part the user talks to. It provides simplified interface to bunch of subsystems. It act as a middleman between client and complex system.
    • Complex System − Many classes that do the real work. These classes or we also call them subsystems are the ones who actually do the tasks. They can be hard to use directly without the facade.
    • Client − The user. Talks only to the facade, not the complex system. Means, the client doesn’t need to know about the complex system, it just uses the facade to get things done.
    Components of Facade Pattern

    Implementation of Facade Design Pattern in C++

    Now, let’s see how we can implement the Facade Design Pattern in C++.

    In this implementation, we will create a simple Home Theater system where we have multiple components like TVSound System, and DVD Player. We will then create a Facade class that provides a simplified interface to control these components.

    Steps to Implement Facade Design Pattern

    Let’s see how we can implement the Facade Design Pattern in C++:

    For this implementation, we follow 5 steps. First we identify the components of complex system. Then we create classes for each component. After that, we create a facade class that provides a simple interface to interact with the complex system. Next, we implement the methods in the facade class to control the components. Finally, we create a client class to use the facade. Final step is to Keep subsystems independent which is totally optional.

    Steps to Implement Facade Design Pattern

    C++ Code for Facade Design Pattern

    Let’s look at the C++ code for the Facade Design Pattern implementation of a Home Theater system.

    Here we will use all the components of the Facade Design Pattern that we discussed earlier. We will create classes for each component of the complex system, a facade class that provides a simple interface to interact with the complex system, and a client class to use the facade.

    #include <iostream>usingnamespace std;// Complex System ComponentsclassTV{public:voidon(){
          cout <<"TV is ON"<< endl;}voidoff(){
          cout <<"TV is OFF"<< endl;}};classSoundSystem{public:voidon(){
          cout <<"Sound System is ON"<< endl;}voidoff(){
          cout <<"Sound System is OFF"<< endl;}};classDVDPlayer{public:voidon(){
          cout <<"DVD Player is ON"<< endl;}voidoff(){
          cout <<"DVD Player is OFF"<< endl;}voidplay(string movie){
          cout <<"Playing movie: "<< movie << endl;}};// FacadeclassHomeTheaterFacade{private:
       TV* tv;
       SoundSystem* soundSystem;
       DVDPlayer* dvdPlayer;public:HomeTheaterFacade(TV* t, SoundSystem* s, DVDPlayer* d
    ):tv(t),soundSystem(s),dvdPlayer(d){}voidwatchMovie(string movie){
          cout <<"Get ready to watch a movie..."<< endl;
          tv->on();
          soundSystem->on();
          dvdPlayer->on();
          dvdPlayer->play(movie);}voidendMovie(){
          cout <<"Shutting down the home theater..."<< endl;
          dvdPlayer->off();
          soundSystem->off();
          tv->off();}};// Clientintmain(){
       TV* tv =newTV();
       SoundSystem* soundSystem =newSoundSystem();
       DVDPlayer* dvdPlayer =newDVDPlayer();
       HomeTheaterFacade* homeTheater =newHomeTheaterFacade(tv, soundSystem, dvdPlayer);
       homeTheater->watchMovie("Inception");
       homeTheater->endMovie();delete homeTheater;delete tv;delete soundSystem;delete dvdPlayer;return0;}

    Following is the output of the above code:

    Get ready to watch a movie...
    TV is ON
    Sound System is ON
    DVD Player is ON
    Playing movie: Inception
    Shutting down the home theater...
    DVD Player is OFF
    Sound System is OFF
    TV is OFF
    

    Pros and Cons of Facade Design Pattern

    The following table highlights the pros and cons of using the Facade Design Pattern −

    ProsCons
    Gives a simple way to use a complex system.Can become too big if it does too much.
    Reduces direct links between client and system.May hide useful features from the client.
    Makes code easier to read and manage by hiding complexity.Can make it hard to use advanced features because they are hidden.
    Helps in organizing code better.Adds another layer to the system, which may slow things down.
    Keeps client and system loosely connected.Can make finding errors harder.

    When to Use Facade Design Pattern?

    Following are some scenarios where you should consider using the Facade Design Pattern −

    • To make a complex system easier to use.
    • For reducing direct connections between client and system.
    • To organize code better.
    • Keeping client and system loosely connected.
    • To hide system details from the client.
    • Making a library or framework simpler to use.
    • Offer a simple interface for common tasks.

    Real-world Applications of Facade Design Pattern

    Following are some real-world applications of the Facade Design Pattern −

    Real Life Applications Facade Design Pattern

    Conclusion

    In this chapter, we learned what the Facade Design Pattern is, its parts, and how to use it effectively. We looked at its good and bad sides, when to use it, and some real uses.

  • Structural Design Pattern in C++

    The Structural Design Patterns is a way of combining or arranging different classes and objects to form larger and complex structures to solve a particular problem in a better way. These patterns help in simplifying the design by identifying simple ways to realize relationships between entities.

    Take a example of a Building. A building is made up of different parts like wallsroofdoors, and windows. Each part has its own characteristics and functions, but when combined, they form a complete structure that serves a specific purpose. Similarly, in software design, structural design patterns help in combining different classes and objects to create larger structures that are easier to understand and maintain.

    Structural design patterns are all about how classes and objects are composed to form larger structures. These patterns provide a way to create relationships between objects and classes in a way that is easy to understand and maintain.

    Types of Structural Design Patterns

    There are 7 main types of structural design patterns −

    • Adapter Pattern − Converts the interface of a class into another interface that a client expects.
    • Bridge Pattern − Separates an abstraction from its implementation so that the two can vary independently.
    • Composite Pattern − Composes objects into tree structures to represent part-whole hierarchies.
    • Decorator Pattern − Adds new functionality to an object dynamically without changing its structure.
    • Facade Pattern − Provides a simplified interface to a complex subsystem.
    • Flyweight Pattern − Reduces the memory footprint by sharing common parts of objects.
    • Proxy Pattern Provides a surrogate or placeholder for another object to control access to it.

    In the subsequent set of chapters, we will cover all these design patterns in detail.

    Illustration of Structural Design Patterns

    Following is the illustration of Structural Design Patterns in C++

    Structural Design Patterns in C++

    We have taken example of a Mall. A entire mall is example of Composite Design Pattern, it’s entrance that shows how Facade Design Pattern works, the security guard at the entrance is example of Proxy Design Pattern, the management system of mall is example of Bridge Design Pattern, the Currency Exchange Point is example of Adapter Design Pattern, the Lamps, Banners, Lights are examples of Decorator Design Pattern, and the Benches and Lamps are examples of Flyweight Design Pattern as they are shared by multiple area like food court, parking area etc.

    Example of Structural Design Patterns in C++

    In this example, we have created a media player application that uses multiple structural design patterns to provide a flexible and maintainable solution. The Adapter Pattern allows us to convert different media file formats into a common interface that the media player can understand.

    The Composite Pattern allows us to create a playlist of media files that can be played together. The Decorator Pattern allows us to add new functionality to the media player dynamically. The Facade Pattern provides a simplified interface to the complex media player subsystem. The Proxy Pattern controls access to the media player and ensures that only authorized users can play certain media files.

    The Bridge Pattern separates the abstraction of the media player from its implementation, allowing us to easily switch between different media player implementations. Finally, the Flyweight Pattern reduces memory usage by sharing common parts of media files.

    Example of Structural Design Patterns in C++

    Following is the code that demonstrates the use of multiple structural design patterns together in C++ to create a media player application −

    #include <iostream>#include <string>#include <vector>#include <memory>usingnamespace std;// MediaFile interfaceclassMediaFile{public:virtual string getType()=0;virtualvoidplay()=0;virtual~MediaFile()=default;};// Concrete MediaFile classesclassMP3File:public MediaFile{public:
          string getType(){return"MP3";}voidplay(){
             cout <<"Playing MP3 file"<< endl;}};classMP4File:public MediaFile{public:
          string getType(){return"MP4";}voidplay(){
             cout <<"Playing MP4 file"<< endl;}};// Adapter PatternclassMediaAdapter:public MediaFile{private:
          shared_ptr<MediaFile> mediaFile;public:MediaAdapter(shared_ptr<MediaFile> file){
             mediaFile = file;}
          string getType(){return mediaFile->getType();}voidplay(){
             mediaFile->play();}};// Composite PatternclassPlaylist:public MediaFile{private:
          vector<shared_ptr<MediaFile>> mediaFiles;public:voidadd(shared_ptr<MediaFile> file){
             mediaFiles.push_back(file);}
          string getType(){return"Playlist";}voidplay(){
             cout <<"Playing playlist:"<< endl;for(auto& file : mediaFiles){
                file->play();}}};// Decorator PatternclassMediaDecorator:public MediaFile{protected:
          shared_ptr<MediaFile> mediaFile;public:MediaDecorator(shared_ptr<MediaFile> file){
             mediaFile = file;}
          string getType(){return mediaFile->getType();}voidplay(){
             mediaFile->play();}};classVisualEffectDecorator:public MediaDecorator{public:VisualEffectDecorator(shared_ptr<MediaFile> file):MediaDecorator(file){}voidplay(){
             mediaFile->play();
             cout <<"Adding visual effects"<< endl;}};classAudioEnhancementDecorator:public MediaDecorator{public:AudioEnhancementDecorator(shared_ptr<MediaFile> file):MediaDecorator(file){}voidplay(){
             mediaFile->play();
             cout <<"Enhancing audio quality"<< endl;}};// Facade PatternclassMediaPlayer{private:
          shared_ptr<MediaFile> mediaFile;public:MediaPlayer(shared_ptr<MediaFile> file){
             mediaFile = file;}voidplay(){
             mediaFile->play();}};// Proxy PatternclassMediaProxy:public MediaFile{private:
          shared_ptr<MediaFile> mediaFile;bool authorized;public:MediaProxy(shared_ptr<MediaFile> file,bool auth){
             mediaFile = file;
             authorized = auth;}
          string getType(){return mediaFile->getType();}voidplay(){if(authorized){
                mediaFile->play();}else{
                cout <<"Access denied"<< endl;}}};// Bridge PatternclassMediaImplementation{public:virtualvoidplay()=0;virtual~MediaImplementation()=default;};classVLCImplementation:public MediaImplementation{public:voidplay(){
             cout <<"Playing using VLC implementation"<< endl;}};classWindowsMediaImplementation:public MediaImplementation{public:voidplay(){
             cout <<"Playing using Windows Media implementation"<< endl;}};classMediaAbstraction{protected:
          shared_ptr<MediaImplementation> implementation;public:MediaAbstraction(shared_ptr<MediaImplementation> impl){
             implementation = impl;}virtualvoidplay()=0;virtual~MediaAbstraction()=default;};classAdvancedMediaPlayer:public MediaAbstraction{public:AdvancedMediaPlayer(shared_ptr<MediaImplementation> impl):MediaAbstraction(impl){}voidplay(){
             implementation->play();}};// Flyweight PatternclassMediaMetadata{private:
          string title;
          string artist;
          string album;public:MediaMetadata(string t, string ar, string al):title(t),artist(ar),album(al){}
          string getTitle(){return title;}
          string getArtist(){return artist;}
          string getAlbum(){return album;}voiddisplay(){
             cout <<"Title: "<< title <<", Artist: "<< artist <<", Album: "<< album << endl;}};classMediaMetadataFactory{private:
          vector<shared_ptr<MediaMetadata>> metadataPool;public:
          shared_ptr<MediaMetadata>getMetadata(string title, string artist, string album){for(auto& meta : metadataPool){if(meta->getTitle()== title &&
                    meta->getArtist()== artist &&
                    meta->getAlbum()== album){return meta;}}
             shared_ptr<MediaMetadata> newMeta =make_shared<MediaMetadata>(title, artist, album);
             metadataPool.push_back(newMeta);return newMeta;}};intmain(){// Create media filesauto mp3 =make_shared<MP3File>();auto mp4 =make_shared<MP4File>();auto adaptedMp3 =make_shared<MediaAdapter>(mp3);auto adaptedMp4 =make_shared<MediaAdapter>(mp4);// Create playlistauto playlist =make_shared<Playlist>();
       playlist->add(adaptedMp3);
       playlist->add(adaptedMp4);
       playlist->add(make_shared<VisualEffectDecorator>(adaptedMp4));
       playlist->add(make_shared<AudioEnhancementDecorator>(adaptedMp3));// Create media player facadeauto player =make_shared<MediaPlayer>(playlist);
       player->play();// Create media proxyauto proxy1 =make_shared<MediaProxy>(adaptedMp4,false);
       proxy1->play();auto proxy2 =make_shared<MediaProxy>(adaptedMp4,true);
       proxy2->play();// Create advanced media player with bridge patternauto vlcImpl =make_shared<VLCImplementation>();
       shared_ptr<MediaAbstraction> advancedPlayer =make_shared<AdvancedMediaPlayer>(vlcImpl);
       advancedPlayer->play();auto wmImpl =make_shared<WindowsMediaImplementation>();
       advancedPlayer =make_shared<AdvancedMediaPlayer>(wmImpl);
       advancedPlayer->play();// Create media metadata using flyweight patternauto metadataFactory =make_shared<MediaMetadataFactory>();auto meta1 = metadataFactory->getMetadata("Song1","Artist1","Album1");auto meta2 = metadataFactory->getMetadata("Song1","Artist1","Album1");auto meta3 = metadataFactory->getMetadata("Song2","Artist2","Album2");
       meta1->display();
       meta2->display();
       meta3->display();return0;}

    Following is the output of the above code −

    Playing playlist:
    Playing MP3 file
    Playing MP4 file
    Playing MP4 file
    
    Adding visual effects
    Playing MP3 file
    Enhancing audio quality
    Access denied
    Playing MP4 file
    Playing using VLC implementation
    Playing using Windows Media implementation
    Title: Song1, Artist: Artist1, Album: Album1
    Title: Song1, Artist: Artist1, Album: Album1
    Title: Song2, Artist: Artist2, Album: Album2
    

    When to Use Structural Design Patterns?

    Structural design patterns are useful in the following scenarios −

    • If you want to simplify the design of a complex system by breaking it down into smaller, more manageable parts.
    • Times when you think you need to improve the flexibility and maintainability of your code by creating relationships between objects and classes that are easy to understand and modify.
    • To optimize the performance of your code by reducing memory usage and improving access to objects.
    • When you want to add new functionality to an object dynamically without changing its structure.
    • To provide a simplified interface to a complex subsystem.
    • If you want to control access to an object by providing a surrogate or placeholder for it.
    • If you want to separate an abstraction from its implementation so that the two can vary independently.

    Pros and Cons of Structural Design Patterns

    Following are the some important pros and cons of Structural Design Patterns −

    ProsCons
    Improves code organization.Can introduce complexity.
    Enhances flexibility and maintainability.May lead to over-engineering.
    Facilitates code reuse.Can impact performance.
    Reduces memory usage.May require additional learning.
    Provides clear structure for complex systems.Can make debugging more difficult.

    Conclusion

    In this chapter, we have discussed the Structural Design Patterns in C++. We have seen the different types of structural design patterns and how they can be used to create flexible and maintainable code. We have also seen an example of how multiple structural design patterns can be used together to create a complex system. Structural design patterns are an important tool for any software developer, and understanding them can help you create better software.

  • Prototype Design Pattern in C++

    The Prototype Pattern is a part of the Creational Design Patterns family.

    Consider a scenario where you have an object and your friend asks you to create its replica. How would you do that? You are probably thinking of creating a new object and then copying the values from the existing object to the new object. That is some good thinking! But, what if the existing objects have some fields that are private and not visible outside the class. And also, you would have to know the class of the existing object to create a new object of the same class, which makes your code dependent on the class of the object. In such cases, we need to use the Prototype Pattern.

    The Prototype Pattern allows us to make copies from an actual object. It declares a common interface for all objects and those objects support cloning themselves. This means the object itself is responsible for creating a copy of itself. The client code can use the common interface to clone the object without knowing the class of the object. This interface has only one method, which is clone(). The clone() method is responsible for creating a copy of the object and returning it to the client code.

    Whichever object that supports cloning is called a prototype. If your objects have too many feilds and many different types of configurations, then you can just clone them.

    In the following image, an artist makes three different types of paintings. If someone wants a copy of one of the paintings, the artist can just clone the painting and give it to the person. The artist doesn’t need to create a new painting from scratch. This is how the Prototype Pattern works.

    Prototype Pattern in C++

    Illustration of Prototype Pattern

    Following is the illustration of Prototype Pattern. In the below image, we have a Client that wants to create a copy of an existing Prototype object. The Client uses the clone() method of the Prototype to create a copy of the object without knowing the class of the object.

    Prototype Pattern in C++

    Implementation of Prototype Pattern in C++

    We can implement the Prototype Pattern in the following two ways −

    • Basic Prototype Pattern − This is the simple way without any registry.
    • Prototype Pattern with Registry − This approach uses a registry to keep track of all prototypes.

    1. Basic Prototype Pattern in C++

    The following illustration shows the steps for implementing the Basic Prototype Pattern in C++

    Basic Prototype Pattern in C++

    Example of Basic Prototype Pattern in C++

    Let’s implement a simple example of Basic Prototype Pattern in C++

    Here we will take an example of a virtual machine class that supports cloning itself. The client will use the clone() method of the VirtualMachine class to create a copy of the object.

    #include <iostream>#include <memory>#include <string>usingnamespace std;// Prototype InterfaceclassVirtualMachine{public:virtual unique_ptr<VirtualMachine>clone()const=0;virtualvoidshowConfig()const=0;virtual~VirtualMachine()=default;};// Concrete Prototype: LinuxVMclassLinuxVM:public VirtualMachine{
       string os;int ram;int cpu;public:LinuxVM(string os,int ram,int cpu):os(move(os)),ram(ram),cpu(cpu){}
    
          unique_ptr<VirtualMachine>clone()constoverride{
             cout <<"Cloning Linux VM..."<< endl;returnmake_unique<LinuxVM>(*this);// deep copy}voidshowConfig()constoverride{
             cout <<"Linux VM - OS: "<< os 
                  <<", RAM: "<< ram <<"GB, CPU: "<< cpu <<" cores"<< endl;}};// Concrete Prototype: WindowsVMclassWindowsVM:public VirtualMachine{
       string os;int ram;int cpu;public:WindowsVM(string os,int ram,int cpu):os(move(os)),ram(ram),cpu(cpu){}
    
          unique_ptr<VirtualMachine>clone()constoverride{
             cout <<"Cloning Windows VM..."<< endl;returnmake_unique<WindowsVM>(*this);}voidshowConfig()constoverride{
             cout <<"Windows VM - OS: "<< os 
                  <<", RAM: "<< ram <<"GB, CPU: "<< cpu <<" cores"<< endl;}};// Client codeintmain(){// Create prototypes
       unique_ptr<VirtualMachine> linuxVM =make_unique<LinuxVM>("Ubuntu 20.04",8,4);
       unique_ptr<VirtualMachine> windowsVM =make_unique<WindowsVM>("Windows 10",16,8);//original objects
       cout <<"Original VMs:"<< endl;
       linuxVM->showConfig();
       windowsVM->showConfig();// Clone objects safely
       cout <<"\nCloning VMs:"<< endl;auto clonedLinuxVM = linuxVM->clone();auto clonedWindowsVM = windowsVM->clone();// Show configurations
       cout <<"\nCloned VMs:"<< endl;
       clonedLinuxVM->showConfig();
       clonedWindowsVM->showConfig();return0;}

    Following is the output of the above program −

    Original VMs:
    Linux VM - OS: Ubuntu 20.04, RAM: 8GB, CPU: 4 cores
    Windows VM - OS: Windows 10, RAM: 16GB, CPU: 8 cores
    
    Cloning VMs:
    Cloning Linux VM...
    Cloning Windows VM...
    
    Cloned VMs:
    Linux VM - OS: Ubuntu 20.04, RAM: 8GB, CPU: 4 cores
    Windows VM - OS: Windows 10, RAM: 16GB, CPU: 8 cores
    

    2. Prototype Pattern with Registry in C++

    The following illustration shows the steps for implementing the Prototype Pattern with Registry in C++

    Prototype Pattern with Registry in C++

    Example of Prototype Pattern with Registry in C++

    Let’s implement a simple example of Prototype Pattern with Registry in C++:

    Here we will take an example of making UI elements like Button and TextBox. We will create a Prototype Registry to keep track of all prototypes. The Client will use the registry to get the prototype and then clone whatever it wants.

    #include <iostream>#include <memory>#include <string>#include <unordered_map>usingnamespace std;// Prototype InterfaceclassUIElement{public:virtual unique_ptr<UIElement>clone()const=0;virtualvoidrender()const=0;virtual~UIElement()=default;};// Concrete Prototype: ButtonclassButton:public UIElement{
       string label;public:Button(string label):label(move(label)){}
    
          unique_ptr<UIElement>clone()constoverride{
             cout <<"Cloning Button..."<< endl;returnmake_unique<Button>(*this);// deep copy}voidrender()constoverride{
             cout <<"Rendering Button: "<< label << endl;}};// Concrete Prototype: TextBoxclassTextBox:public UIElement{
       string text;public:TextBox(string text):text(move(text)){}
    
          unique_ptr<UIElement>clone()constoverride{
             cout <<"Cloning TextBox..."<< endl;returnmake_unique<TextBox>(*this);}voidrender()constoverride{
             cout <<"Rendering TextBox: "<< text << endl;}};// Prototype RegistryclassPrototypeRegistry{
       unordered_map<string, unique_ptr<UIElement>> prototypes;public:voidregisterPrototype(const string& name, unique_ptr<UIElement> prototype){
             prototypes[name]=move(prototype);}
    
          unique_ptr<UIElement>getPrototype(const string& name)const{auto it = prototypes.find(name);if(it != prototypes.end()){return it->second->clone();}returnnullptr;}};// Client codeintmain(){// Create registry and register prototypes
       PrototypeRegistry registry;
       registry.registerPrototype("Button",make_unique<Button>("Submit"));
       registry.registerPrototype("TextBox",make_unique<TextBox>("Enter your name"));// Clone objects safely using the registry
       cout <<"Cloning UI Elements:"<< endl;auto clonedButton = registry.getPrototype("Button");auto clonedTextBox = registry.getPrototype("TextBox");// Show configurations
       cout <<"\nCloned UI Elements:"<< endl;if(clonedButton) clonedButton->render();if(clonedTextBox) clonedTextBox->render();return0;}

    Following is the output of the above program −

    Cloning UI Elements:
    Cloning Button...
    Cloning TextBox...
    
    Cloned UI Elements:
    Rendering Button: Submit
    Rendering TextBox: Enter your name
    

    Key Properties of Prototype Pattern

    Following are the key properties of the Prototype Pattern −

    • Cloning, you can copy of existing objects. You don’t need to create new objects from scratch.
    • Decoupling, the client code is decoupled from the class of the object.
    • Dynamic, you can add new prototypes at runtime.
    • Can Create More than one type, you can create different types of objects using the same interface.
    • Memory Usage, you can save memory by reusing existing objects instead of creating new ones.

    Conclusion

    In this chapter, we learned what is the Prototype Pattern and how to implement it in C++. We also saw two different ways of implementing the Prototype Pattern: Basic Prototype Pattern and Prototype Pattern with Registry. The Prototype Pattern is a powerful design pattern that allows us to create copies of existing objects without knowing their class. It helps in reducing memory usage and decoupling the client code from the class of the object.

  • Abstract Factory Design Pattern in C++

    The Abstract Factory is a creational design pattern that provides an interface with methods for a particular type of object, but it allows subclasses to alter the type of objects that will be created. The Abstract Factory pattern is used when we have multiple families of related or dependent objects and we want to create them without specifying their concrete classes.

    In other words, it is a factory of factories. In the last chapter, we discussed the Factory Method pattern which is used to create objects of a single family. But in Abstract Factory pattern, we can create objects of multiple families.

    Imagine you are building your dream house, and you have two choices for furniture: Modern or Victorian. Each type has its own matching set of items like a chair, a sofa, and a coffee table. Instead of picking each item one by one and possibly making a mix-match, you use a furniture factory that gives you the full set in one style. If you want Modern, you get all Modern items. If you want Victorian, you get all Victorian items. The Abstract Factory pattern works the same way: it gives you a whole set of related objects in one style, so everything fits together perfectly.

    Implementation of Abstract Factory Pattern in C++

    Following are the some important ways to implement Abstract Factory Pattern in C++:

    • Conventional Abstract Factory − It uses classic interface and concrete factories.
    • Registry-based Abstract Factory − It uses a registry of factories to create objects of different families.

    Concrete Factory means a class which implements the Abstract Factory interface and is responsible for creating the objects of a particular family. The client code uses the abstract factory interface to create the objects without knowing the concrete classes.

    Conventional Abstract Factory Implementation in C++

    In this approach, we create an abstract factory interface which is used for defining the methods for creating family of related objects. Then, we create concrete factory classes that implement the abstract factory interface and provide the implementation for creating the objects of a particular family.

    Example of Abstract Factory Pattern in C++

    In the below example, we have an abstract factory interface FurnitureFactory that defines the methods for creating family of related objects. We have two concrete factory classes ModernFurnitureFactory and VictorianFurnitureFactory that implement the FurnitureFactory interface and provide the implementation for creating the objects of a particular family. The client code uses the abstract factory interface to create the objects without knowing the concrete classes.

    Abstract Factory Pattern in C++

    Let’s implement a simple example of Abstract Factory Pattern in C++

    #include <iostream>#include <string>usingnamespace std;// Abstract Product AclassChair{public:virtual string getType()=0;};// Abstract Product BclassSofa{public:virtual string getType()=0;};// Concrete Product A1classModernChair:public Chair{public:
          string getType(){return"Modern Chair";}};// Concrete Product B1classModernSofa:public Sofa{public:
          string getType(){return"Modern Sofa";}};// Concrete Product A2classVictorianChair:public Chair{public:
          string getType(){return"Victorian Chair";}};// Concrete Product B2classVictorianSofa:public Sofa{public:
          string getType(){return"Victorian Sofa";}};// Abstract FactoryclassFurnitureFactory{public:virtual Chair*createChair()=0;virtual Sofa*createSofa()=0;};// Concrete Factory 1classModernFurnitureFactory:public FurnitureFactory{public:
          Chair*createChair(){returnnewModernChair();}
          Sofa*createSofa(){returnnewModernSofa();}};// Concrete Factory 2classVictorianFurnitureFactory:public FurnitureFactory{public:
          Chair*createChair(){returnnewVictorianChair();}
          Sofa*createSofa(){returnnewVictorianSofa();}};intmain(){
       FurnitureFactory* factory;
       Chair* chair;
       Sofa* sofa;// Create Modern Furniture
       factory =newModernFurnitureFactory();
       chair = factory->createChair();
       sofa = factory->createSofa();
       cout <<"Created the Modern furniture:"<< endl;
       cout <<"Chair: ";
       cout << chair->getType()<< endl;
       cout <<"Sofa: ";
       cout << sofa->getType()<< endl;// Create Victorian Furniture
       factory =newVictorianFurnitureFactory();
       chair = factory->createChair();
       sofa = factory->createSofa();
       cout <<"Created the Victorian furniture:"<< endl;
       cout <<"Chair: ";
       cout << chair->getType()<< endl;
       cout <<"Sofa: ";
       cout << sofa->getType()<< endl;return0;}

    Following is the output of the above program −

    Created the Modern furniture:
    Chair: Modern Chair
    Sofa: Modern Sofa
    Created the Victorian furniture:
    Chair: Victorian Chair
    Sofa: Victorian Sofa
    

    Registry-based Abstract Factory Implementation in C++

    This is a similar approach we have discussed in the Factory Method pattern. In this approach, we create a registry of factories that can create objects of different families. The registry is a map that maps the family name to the corresponding factory. The client code uses the registry to get the factory for a particular family and then uses the factory to create the objects.

    Example of Registry-based Abstract Factory Pattern in C++

    Let’s take an example of a car factory. Where, we have an abstract class CarFactory that defines the factory method createCar(). Then, we create concrete subclasses such as SUVFactory and SedanFactory that implement the factory method to create specific types of cars. We also create a registry of factories that maps the family name to the corresponding factory.

    Registry-based Abstract Factory Pattern in C++

    Following is a simple example of Registry-based Abstract Factory Pattern in C++

    #include <iostream>#include <string>#include <map>usingnamespace std;// Product interfaceclassCar{public:virtual string getType()=0;};// Concrete ProductsclassSUV:public Car{public:
          string getType(){return"SUV";}};classSedan:public Car{public:
          string getType(){return"Sedan";}};// Factory interfaceclassCarFactory{public:virtual Car*createCar()=0;};// Concrete FactoriesclassSUVFactory:public CarFactory{public:
          Car*createCar(){returnnewSUV();}};classSedanFactory:public CarFactory{public:
          Car*createCar(){returnnewSedan();}};// Registry of factoriesclassCarFactoryRegistry{private:
          map<string, CarFactory*> registry;public:voidregisterFactory(string type, CarFactory* factory){
             registry[type]= factory;}
          CarFactory*getFactory(string type){return registry[type];}};intmain(){
       CarFactoryRegistry registry;
       registry.registerFactory("SUV",newSUVFactory());
       registry.registerFactory("Sedan",newSedanFactory());
    
       CarFactory* factory;
       Car* car;// Create SUV
       factory = registry.getFactory("SUV");
       car = factory->createCar();
       cout <<"Created car of type: ";
       cout << car->getType()<< endl;// Create Sedan
       factory = registry.getFactory("Sedan");
       car = factory->createCar();
       cout <<"Created car of type: ";
       cout << car->getType()<< endl;return0;}

    Following is the output of the above program −

    Created car of type: SUV
    Created car of type: Sedan
    

    Pro’s and Cons of Abstract Factory Pattern

    Following are the some important pros and cons of Abstract Factory Pattern −

    ProsCons
    Makes groups of matching objects easy to create without worrying about details.Can make code bigger and more complex because you need extra factory classes.
    Keeps code flexible and lets you swap object families easily.Lots of classes if you have many object families.
    Easy to add new object families without changing old code.More work to update and keep track of all the factories.
    Ensures everything matches no mix-and-match mistakes.Too much for simple cases where one factory is enough.

    When to use Abstract Factory Pattern?

    Following are the some important scenarios where we can use Abstract Factory Pattern −

    • When the system needs to be independent of how its products are createdcomposed, and represented.
    • When the system is configured with one of multiple families of products.
    • When we want to provide a library of products, and we want to reveal just their interfaces, not their implementations.
    • When we want to ensure that the client code uses only objects from the same family.

    Conclusion

    Abstract Factory is a creational software design pattern that provides an interface for generating families of related or dependent objects without revealing their concrete classes. It is used when we have multiple families of related or dependent objects and want to create them without having their concrete classes defined. The Abstract Factory pattern conceals the objects’ construction and offers loose binding of the concrete classes and the client code, and it also satisfies the Open/Closed Principle, because it is feasible to add new families of related objects without altering the code.

  • Factory Method Pattern in C++

    The Factory Method Pattern is a creational design pattern that defines an interface for creating an object. It allows its subclasses to change the type of object that will be created.

    For example, imagine you are creating an employee management system for your comapany, and there are different types of employees such as full-time employees, part-time employees, and contract employees. Each type of employee has different attributes and behaviors. Instead of creating a separate class for each type of employee, you can use the factory method pattern to create a single interface for creating employees and then let the subclasses decide which type of employee to create.

    So, instead of calling new at the client side, we can just call a factory method which will return the object of the desired type.

    Implementation of Factory Method Pattern in C++

    There are ways to implement the Factory Method Pattern in C++. Some of the important and common implementations are:

    • Factory Method (GoF official one)
    • Simple Factory (static method)
    • Registry-based Factory (parameterized)

    Let’s discuss each of these implementations in detail.The important point to note is that the Factory Method Pattern is often used in conjunction with other design patterns such as Singleton, Abstract Factory, and Builder patterns.

    Also, the type of implementation you choose will depend on the specific requirements of your application and the complexity of the object creation process.

    Implementation of Factory Method by the Official GoF Way in C++

    This is an official implementation of the factory method pattern as described in the Gang of Four book. In this approach, we create an abstract class that defines the factory method and then create concrete subclasses that implement the factory method to create specific types of objects.

    Let’s take an example of a car factory. We have an abstract class CarFactory that defines the factory method createCar(). Then, we create concrete subclasses such as SUVFactory and SedanFactory that implement the factory method to create specific types of cars.

    Example of Factory Method Pattern in C++

    Following is the code implementation of Factory Method Pattern in C++ −

    #include <iostream>#include <string>classCar{public:virtualvoiddrive()=0;virtual~Car(){}};classSUV:public Car{public:voiddrive(){
            std::cout <<"Driving an SUV"<< std::endl;}};classSedan:public Car{public:voiddrive(){
            std::cout <<"Driving a Sedan"<< std::endl;}};classCarFactory{public:virtual Car*createCar()=0;virtual~CarFactory(){}};classSUVFactory:public CarFactory{public:
        Car*createCar(){returnnewSUV();}};classSedanFactory:public CarFactory{public:
        Car*createCar(){returnnewSedan();}};intmain(){
        CarFactory* factory =newSUVFactory();
        Car* car = factory->createCar();
        car->drive();delete car;delete factory;
    
        factory =newSedanFactory();
        car = factory->createCar();
        car->drive();delete car;delete factory;return0;}

    Following is the output of the above code −

    Driving an SUV
    Driving a Sedan
    

    Simple Factory Pattern Implementation in C++

    This is a simple way to implement the factory pattern also known as Static Factory Method. In this approach, we create a single class that contains a static method to create objects of different types based on the input parameters. Then, in the factory method, we use a switch statement or if-else statements to determine which type of object to create based on the input parameters.

    Let’s take an example of a shape factory. Here, we have a class Shape and different subclasses such as Circle and Square. We can create a static factory method in the ShapeFactory class to create objects of these subclasses based on the input parameters.

    Example of Simple Factory Pattern in C++

    Following is the code implementation of Simple Factory Pattern in C++

    #include <iostream>#include <string>classShape{public:virtualvoiddraw()=0;virtual~Shape(){}};classCircle:public Shape{public:voiddraw(){
            std::cout <<"Drawing a Circle"<< std::endl;}};classSquare:public Shape{public:voiddraw(){
            std::cout <<"Drawing a Square"<< std::endl;}};classShapeFactory{public:static Shape*createShape(const std::string& type){if(type =="Circle"){returnnewCircle();}elseif(type =="Square"){returnnewSquare();}returnnullptr;}};classClient{public:voiddrawShape(const std::string& type){
            Shape* shape =ShapeFactory::createShape(type);if(shape){
                shape->draw();delete shape;}else{
                std::cout <<"Invalid shape type"<< std::endl;}}};intmain(){
        Client client;
        client.drawShape("Circle");
        client.drawShape("Square");
        client.drawShape("Triangle");return0;}

    Following is the output of the above code −

    Drawing a Circle
    Drawing a Square
    Invalid shape type
    

    Registry-based Factory Pattern Implementation in C++

    This is a more advanced way to implement the factory pattern. In this approach, we create a registry of factory methods that can be used to create objects of different types. The registry is typically implemented as a map or dictionary that maps a string or an enum value to a factory method. This allows us to easily add new types of objects without modifying the existing code.

    In the previous approaches, we have used block of if-else or used small factory classes for each type. But in this approach, we can centralize the creation logic in a single registry class.

    Think of it as a map where −

    • The key is the type of thing we want (like “Cat” or “Dog”).
    • The value is a function that knows how to make that thing we want.

    It is like a notebook where you write down how to make different things. When you want to make something, you look it up in your notebook and follow the instructions. And when you want to make something new, you just add a new entry to your notebook without changing the existing ones.

    This way, we can easily extend the factory to create new types of objects without modifying the existing code.

    Example of Registry-based Factory Pattern in C++

    Following is the code implementation of Registry-based Factory Pattern in C++.

    #include <iostream>#include <string>#include <map>#include <functional>classShape{public:virtualvoiddraw()=0;};classCircle:public Shape{public:voiddraw(){
             std::cout <<"Drawing a Circle"<< std::endl;}};classSquare:public Shape{public:voiddraw(){
             std::cout <<"Drawing a Square"<< std::endl;}};classShapeFactory{public:using ShapeCreator = std::function<Shape*()>;static Shape*createShape(const std::string& type){auto it =registry().find(type);if(it !=registry().end()){return it->second();}returnnullptr;}staticvoidregisterShape(const std::string& type, ShapeCreator creator){registry()[type]= creator;}private:static std::map<std::string, ShapeCreator>&registry(){static std::map<std::string, ShapeCreator> instance;return instance;}};classClient{public:voiddrawShape(const std::string& type){
             Shape* shape =ShapeFactory::createShape(type);if(shape){
                shape->draw();delete shape;}else{
                std::cout <<"Invalid shape type"<< std::endl;}}};intmain(){ShapeFactory::registerShape("Circle",[](){returnnewCircle();});ShapeFactory::registerShape("Square",[](){returnnewSquare();});
    
       Client client;
       client.drawShape("Circle");
       client.drawShape("Square");
       client.drawShape("Triangle");return0;}

    Following is the output of the above code.

    Drawing a Circle 
    Drawing a Square 
    Invalid shape type 
    

    The Registry-based Factory Pattern has several important properties that make it very useful for beginners to understand.

    • First, it provides extensibility, which means you can easily add new types of shapes to your program without having to change any of the code you already wrote. This is like being able to add new recipes to your cookbook without having to rewrite the existing ones.
    • Second, it offers centralized control, meaning all the logic for creating different shapes is kept in one place (the factory), making it much easier to manage and find when you need to make changes. Think of it like having all your tools organized in one toolbox instead of scattered around your garage.
    • Finally, it provides decoupling, which is a fancy way of saying that the parts of your code that use the shapes don’t need to know exactly how those shapes are created – they just ask the factory for what they need, similar to how you order food at a restaurant without needing to know how the kitchen prepares it.

    Pros and Cons of Factory Method Pattern

    Following are some of the pros and cons of using the Factory Method Pattern.

    ProsCons
    Encapsulates object creation logic.Can cause unnecessary complexity if not used properly.
    Code become easy to reuse and maintain.Multiple factory classes can make the codebase complex.
    Supports the Open/Closed Principle that allows new types of objects to be added without modifying existing code.Can make the code harder to understand for developers who does not know the pattern.
    Decouples the client code from the concrete classes.It may affect performance due to the additional layer of abstraction.

    Real-World Applications of Factory Method Pattern

    Following are some real-world applications of the Factory Method Pattern:

    • GUI Frameworks − Many GUI frameworks use factory methods to create UI components like buttons, text fields, etc.
    • Game Development − In game development, factory methods are used to create different types of game objects (e.g., enemies, power-ups) without specifying their concrete classes.
    • Database Connections − Factory methods can be used to create database connection objects, and allows them to be used interchangeably for different types of databases.

    Conclusion

    The Factory Method is a powerful creational design pattern which provides a way to create an object without exposing the creation logic to the client. We can make our code easy to maintain and also we can reuse it in different parts of the application. But, it is important to use the Factory Method carefully, as it can add unnecessary complexity to the codebase, if not used correctly.

  • Singleton Pattern in C++

    Singleton Pattern is a design pattern which allows to create only one object of a class. Instead of allowing the class to create multiple instances everytime it is called, the singleton pattern ensures that only one instance of the class is created and it also provides it a global access point so that it can be accessed from anywhere in the code.

    The singleton pattern is useful when exactly one object is needed to coordinate actions across the system. For example, imagine you are in a office and you need to use a printer. Instead of having printer for a each employee, you can have a single printer that is shared by all employees. This way, you can ensure that only one person can use the printer at a time and it also saves resources.

    Key Points of Singleton Pattern

    Following are the key points of Singleton Pattern −

    • It restricts the instantiation of a class to one single instance.
    • It provides a global access point to that instance.
    • It is often used for managing shared resources such as database connections, configuration settings, logging, etc.
    • It can be implemented using lazy initialization, where the instance is created only when it is needed for the first time.

    Implementation of Singleton Pattern in C++

    There are several ways to implement the Singleton Pattern in C++. Some of the important and common implementations are −

    • Lazy Initialization Singleton
    • Eager Initialization Singleton (Hungry Singleton)
    • Mayers’ Singleton

    Mostly, the lazy initialization singleton is used as it is more efficient and it also saves memory. However, the eager initialization singleton is simpler and it is also thread-safe. The Mayers’ singleton implementation is a very good modern approach for creating singleton classes in C++.

    Lazy Initialization Singleton

    In this approach, the instance of the class is created only when it is needed for the first time. This can help us in creating only one instance of the class and it also saves memory.

    Step to implement Singleton Pattern in C++

    Following are the steps to implement Singleton Pattern in C++ −

    • Make the constructor of the class private so that it cannot be instantiated from outside the class.
    • Then, create a static variable that holds the single instance of the class.
    • Create a static method that returns the instance of the class. This method checks if the instance is already created, if not it creates one and returns it. Otherwise, it simply returns the existing instance.

    Example of Singleton Pattern in C++

    In the below example, we have a Logger class that implements the singleton pattern. The getInstance() method returns the single instance of the Logger class. The log() method is used to log messages.

    Let’s implement a simple Logger class using Singleton Pattern in C++.

    #include <iostream>#include <string>usingnamespace std;// Lazy Initialization Singleton of LoggerclassLogger{private:static Logger* instance;Logger(){}public:static Logger*getInstance(){if(instance ==nullptr){
                instance =newLogger();}return instance;}voidlog(string message){
             cout <<"Log: "<< message << endl;}};// Initialize the static member
    Logger* Logger::instance =nullptr;// Main functionintmain(){
       Logger* logger =Logger::getInstance();
       logger->log("This is a log message.");
       Logger* l1 =Logger::getInstance();
       l1->log("This is another log message.");return0;}

    Following is the output of the above program −

    Log: This is a log message.
    Log: This is another log message.
    

    Eager Initialization Singleton(Hungry Singleton) Implementation

    In this approach, we create the instance of the class at the time of class loading. This approach is simpler and it is also thread-safe. However, there is a drawback of this approach is that the instance is created even if it is not used, which can lead to resource wastage. So if you are sure that the instance will be used, then this approach is a good choice.

    Example of Eager Initialization Singleton Pattern in C++

    Let’s implement a simple Logger class using Eager Initialization Singleton Pattern in C++.

    #include <iostream>#include <string>usingnamespace std;// Eager Initialization Singleton of LoggerclassLogger{private:static Logger* instance;Logger(){}public:static Logger*getInstance(){return instance;}voidlog(string message){
             cout <<"Log: "<< message << endl;}};// Initialize the instance at the time of class loading
    Logger* Logger::instance =newLogger();// Main functionintmain(){
       Logger* logger =Logger::getInstance();
       logger->log("This is a log message.");
       Logger* l1 =Logger::getInstance();
       l1->log("This is another log message.");return0;}

    Following is the output of the above program −

    Log: This is a log message.
    Log: This is another log message.
    

    Mayers’ Singleton Implementation

    The Mayers’ Singleton implementation is a very good modern approach for creating singleton classes in C++. This approach uses a static local variable inside the getInstance() method to hold the single instance of the class. The instance is created when the method is called for the first time and it is destroyed automatically when the program exits. This approach is thread-safe and it also ensures that only one instance of the class is created.

    Example of Mayers’ Singleton Pattern in C++

    Let’s implement a simple Logger class using Mayers’ Singleton Pattern in C++.

    #include <iostream>#include <string>usingnamespace std;// Mayers' Singleton of LoggerclassLogger{private:Logger(){}public:static Logger&getInstance(){static Logger instance;return instance;}voidlog(string message){
             cout <<"Log: "<< message << endl;}};// Main functionintmain(){
       Logger& logger =Logger::getInstance();
       logger.log("This is a log message.");
       Logger& l1 =Logger::getInstance();
       l1.log("This is another log message.");return0;}

    Following is the output of the above program −

    Log: This is a log message.
    Log: This is another log message.
    

    Real-world use cases of Singleton Pattern

    Following are some real-world use cases of Singleton Pattern −

    • Logger class − As we have seen in the examples, the logger class uses the singleton pattern, so it can be accessed anywhere but creates only one instance throughout the application.
    • Configuration class − A configuration class can be implemented as a singleton to ensure that there is only one instance of the configuration settings throughout the application.
    • Database connection class − Another usecase is to implement a database connection class, so that you don’t need to create multiple connections to the database.
    • Printer Spooler − A printer spooler can be implemented as a singleton to manage print jobs in a centralized manner. So, your whole system has only one instance of the printer spooler instead of making multiple instances for every application on the system.

    Conclusion

    In this chapter, we covered in detail the Singleton Pattern in C++. We explained how to implement it and also provided an example of a Logger class that uses the singleton pattern. The singleton pattern is a useful design pattern which helps in managing shared resources and it also ensures that only one instance of a class is created.